
10 Crochet Balaclava Ideas for Warm Layering and Statement Hoods
Crochet balaclavas can look very different depending on the face opening, neck coverage, hood shape, and finishing details. Some sit close to the head like a fitted winter hood, while others feel closer to a scarf, cowl, or playful animal-ear accessory.
This collection gives readers a practical mix to compare before choosing a tutorial. There are classic shapes, tie-front styles, motif-based hoods, ski-mask versions, ear details, and turtleneck cowls, so the final choice can match the intended coverage, styling, and fit.
Quick List
- Crochet Classic Close-Fit Balaclava
- Crochet Tie-Front Balaclava Hood
- Crochet Granny Square Balaclava Hood
- Crochet Cat Ear Balaclava
- Crochet Bear Ear Hooded Scarf Balaclava
- Crochet Full Ski Mask Balaclava
- Crochet Turtleneck Hoodie Balaclava
- Crochet Ribbed Hooded Cowl Balaclava
- Crochet Made-to-Measure Drawstring Balaclava
- Crochet Scarf-Style Balaclava Hood
Why These Crochet Balaclava Projects Are Worth Making
Balaclavas are useful crochet projects because small design changes can affect how the finished piece feels and functions. A close-fit hood gives a neater outline, a cowl-style version adds more neck coverage, and a tie or drawstring can help shape the face opening. Motif-based versions bring more color placement, while animal-ear details make the project more playful.
They also offer room for practical decision-making. Readers can compare whether they want a soft hood, a structured ski-mask shape, a scarf-like finish, or a garment-style turtleneck. Before starting, it helps to check the creator’s size notes, material list, finishing method, and whether the finished views show the fit from more than one angle.
1. Crochet Classic Close Fit Balaclava
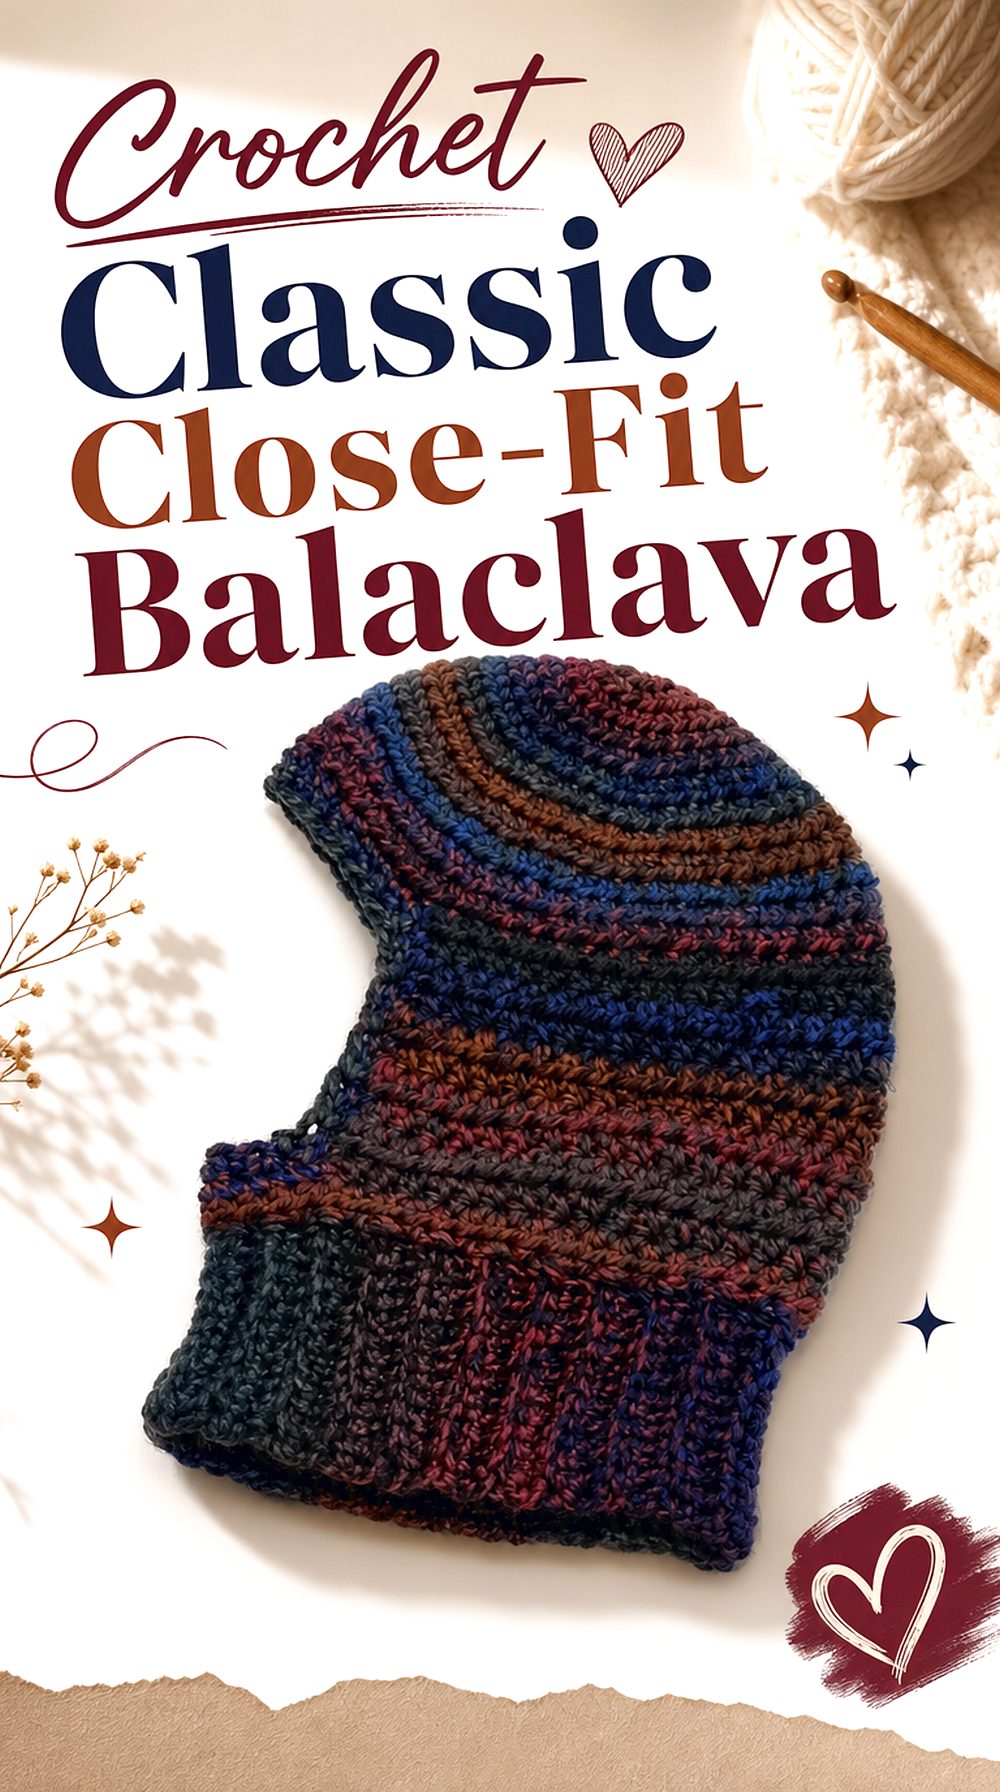
A close-fit balaclava is a good starting point for readers who want a simple hood shape without extra ears, motifs, or heavy decorative details. This version focuses on a full face opening, a covered head, and a lower section that sits around the neck.
The clean shape makes it different from the playful and scarf-style options later in the list. It may suit readers who want to compare basic fit, face framing, and everyday layering before moving into more detailed balaclava styles.
Check the Face Opening
The face opening is one of the most important parts of a classic balaclava because it affects both comfort and appearance. Readers should look closely at how the opening sits around the forehead, cheeks, and chin in the finished view. A neat opening can make the piece easier to layer with coats and sweaters without adding extra visual bulk.
Think About Neck Coverage
A classic balaclava can vary from short lower edging to deeper neck coverage. Before choosing this style, readers should check how far the finished piece extends below the chin and whether it appears intended to tuck into outerwear. That small difference can change whether the finished item feels more like a hood or a hooded neck warmer.
Use Try-On Points Carefully
This tutorial includes several try-on moments in its structure, which can help readers compare the shape while working without relying only on the final reveal. Anyone following along should pause at visible fit checks and compare the hood height, lower edge, and face opening before continuing. Exact construction details should still come from the original source.
Original Tutorial and Creator Credit
Creator: brittanyalicecrochet
2. Crochet Tie Front Balaclava Hood
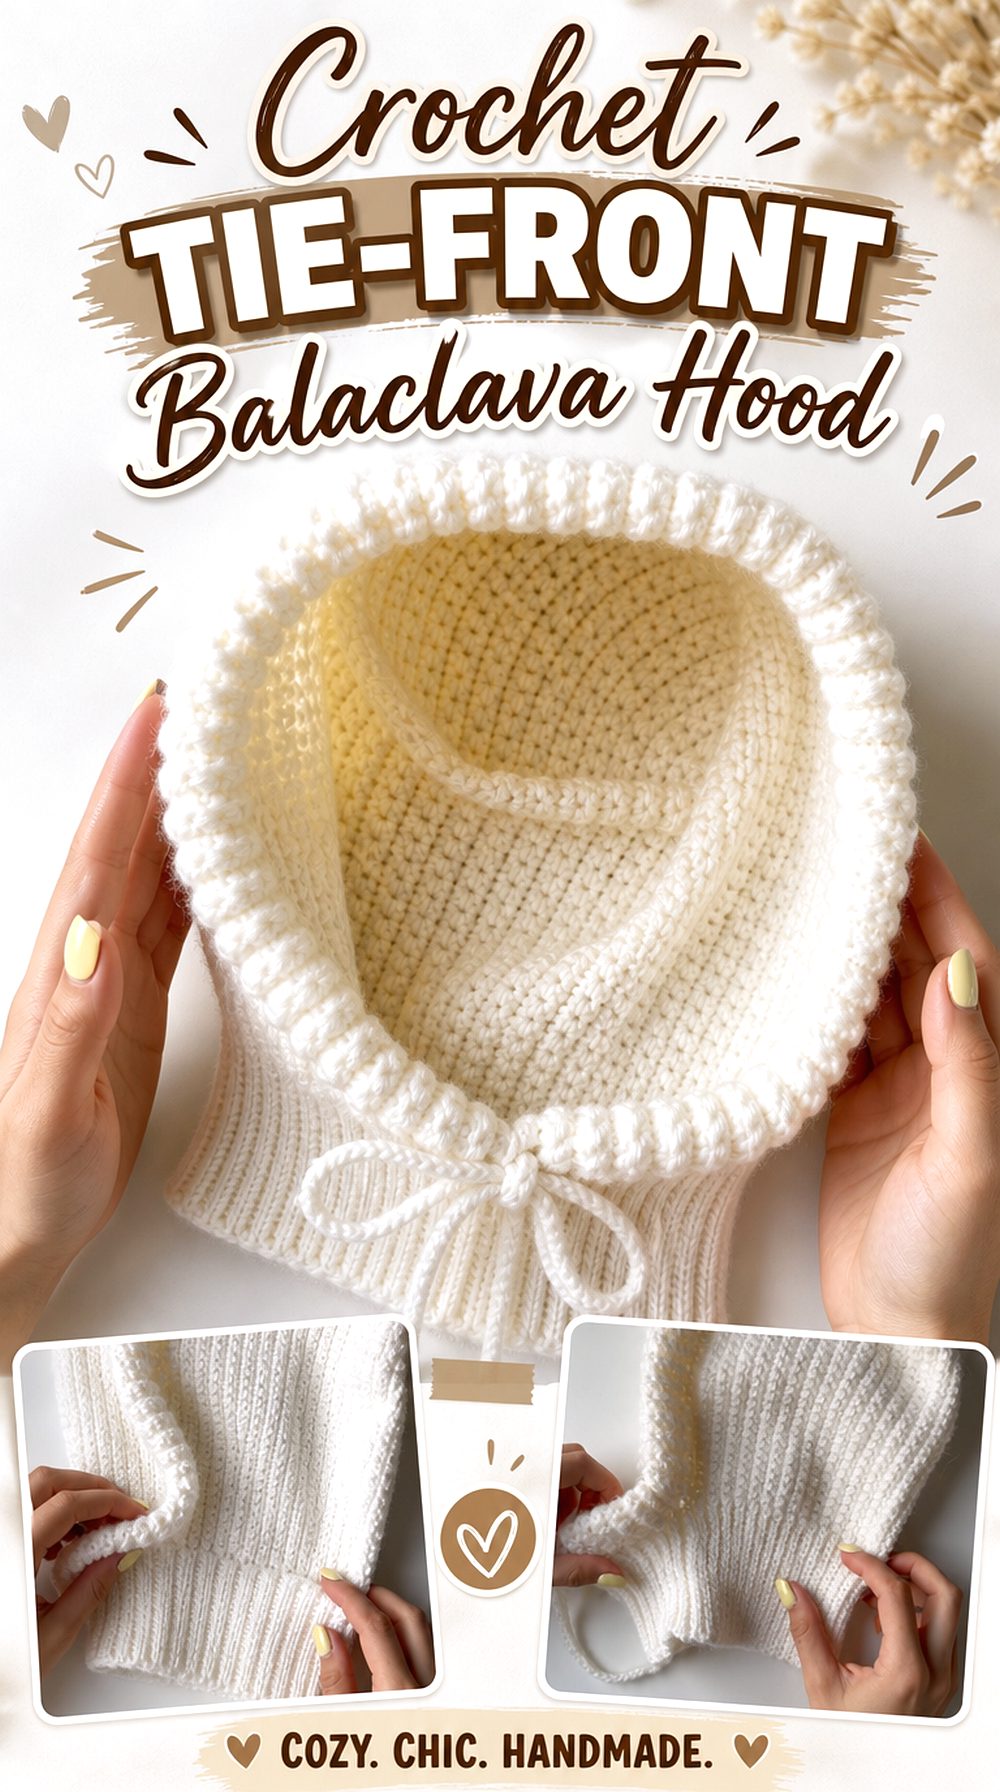
The tie-front style gives this balaclava a more adjustable-looking finish than a plain hood. The cord detail sits around the front edge, which makes the face opening feel more defined and gives the finished piece a soft gathered look.
This project stands apart from the classic fitted version because the tie is part of the visual design. It may appeal to readers who like a hood that can be styled with the cord visible rather than hidden inside a coat collar.
Look Closely at the Tie Placement
The tie is not only decorative; it changes how the front edge of the balaclava reads visually. Readers should check where the cord sits, how it exits the edging, and whether the finished front looks open, gathered, or more shaped. A tie-front hood may need more attention at the finishing stage than a simple no-cord version.
Confirm the Finished Measurements
The creator provides measurements in the source description, so readers who care about fit should compare those notes with their own preferred hood length and face opening. Measurements matter more with a tie-front balaclava because the cord and ribbing can affect how the front edge sits. Avoid assuming it will fit the same as another balaclava pattern.
Prepare for Ribbing and Cord Finishing
This design includes both ribbing and a cord detail, so the last stage is important to the finished appearance. Readers should make sure they understand how the edge is meant to look before cutting yarn or hiding ends. The original tutorial is the safest place to follow the exact order and placement.
Original Tutorial and Creator Credit
Creator: Kenikse Crochet
3. Crochet Granny Square Balaclava Hood
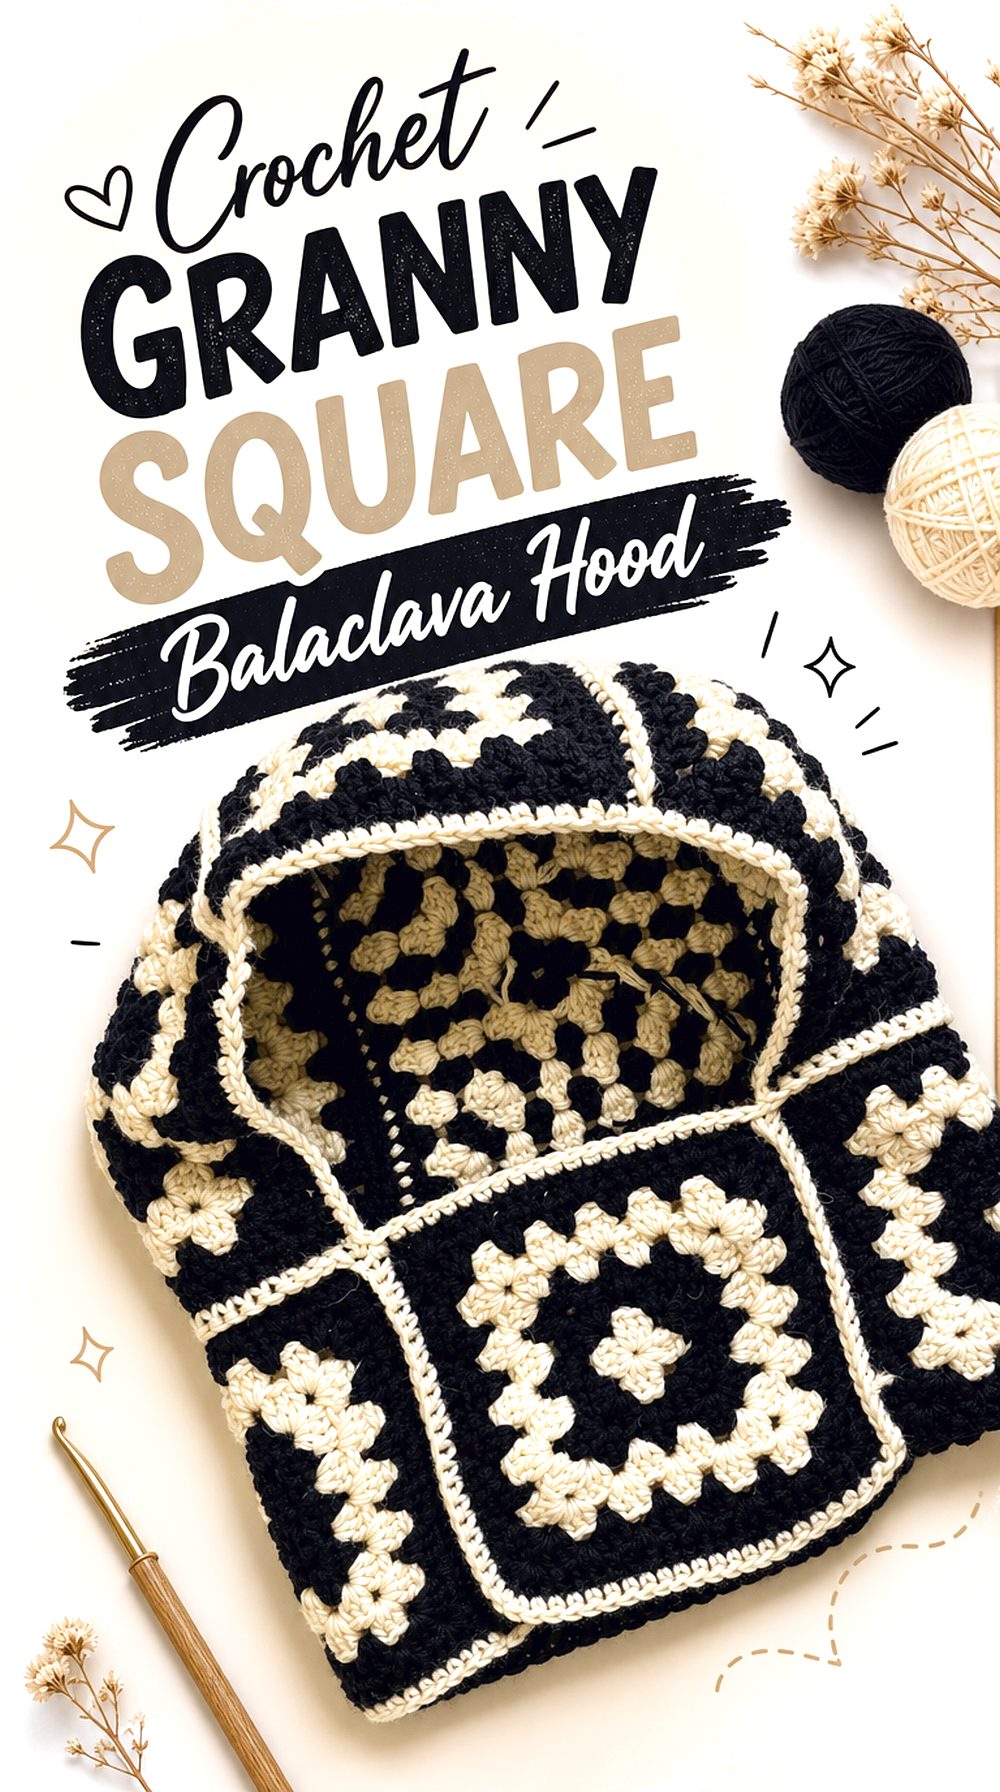
A granny square balaclava has a very different look from a smooth fitted hood because the motif layout becomes part of the design. The square sections create visible blocks of color and texture, while the hood shape keeps the project wearable rather than just decorative.
This option is useful for readers who want a balaclava with a clear handmade motif style. It also gives more room to plan color placement than the solid ski-mask and turtleneck versions in the collection.
Plan the Motif Layout
With a granny square balaclava, the arrangement of the squares affects the final look. Readers should pay attention to how the motifs are positioned around the head, face opening, and lower edge before joining. Color balance matters here because one high-contrast square can draw attention to a specific area of the hood.
Watch the Joining Section Closely
The joining stage is especially important on a motif-based balaclava because the separate squares need to become a wearable hood. Readers should slow down during that part and compare the orientation of each square before moving forward. A wrong-facing motif can be more noticeable here than it would be in a solid one-piece project.
Check the Edge Finish
The border or ribbing around a granny square balaclava helps soften the blocky motif structure and frame the face opening. Readers should check whether the edging gives the finished piece enough definition for their preferred look. The edge finish can also affect whether the hood appears casual, bold, or more polished.
Original Tutorial and Creator Credit
Creator: Crochetclubstore
4. Crochet Cat Ear Balaclava
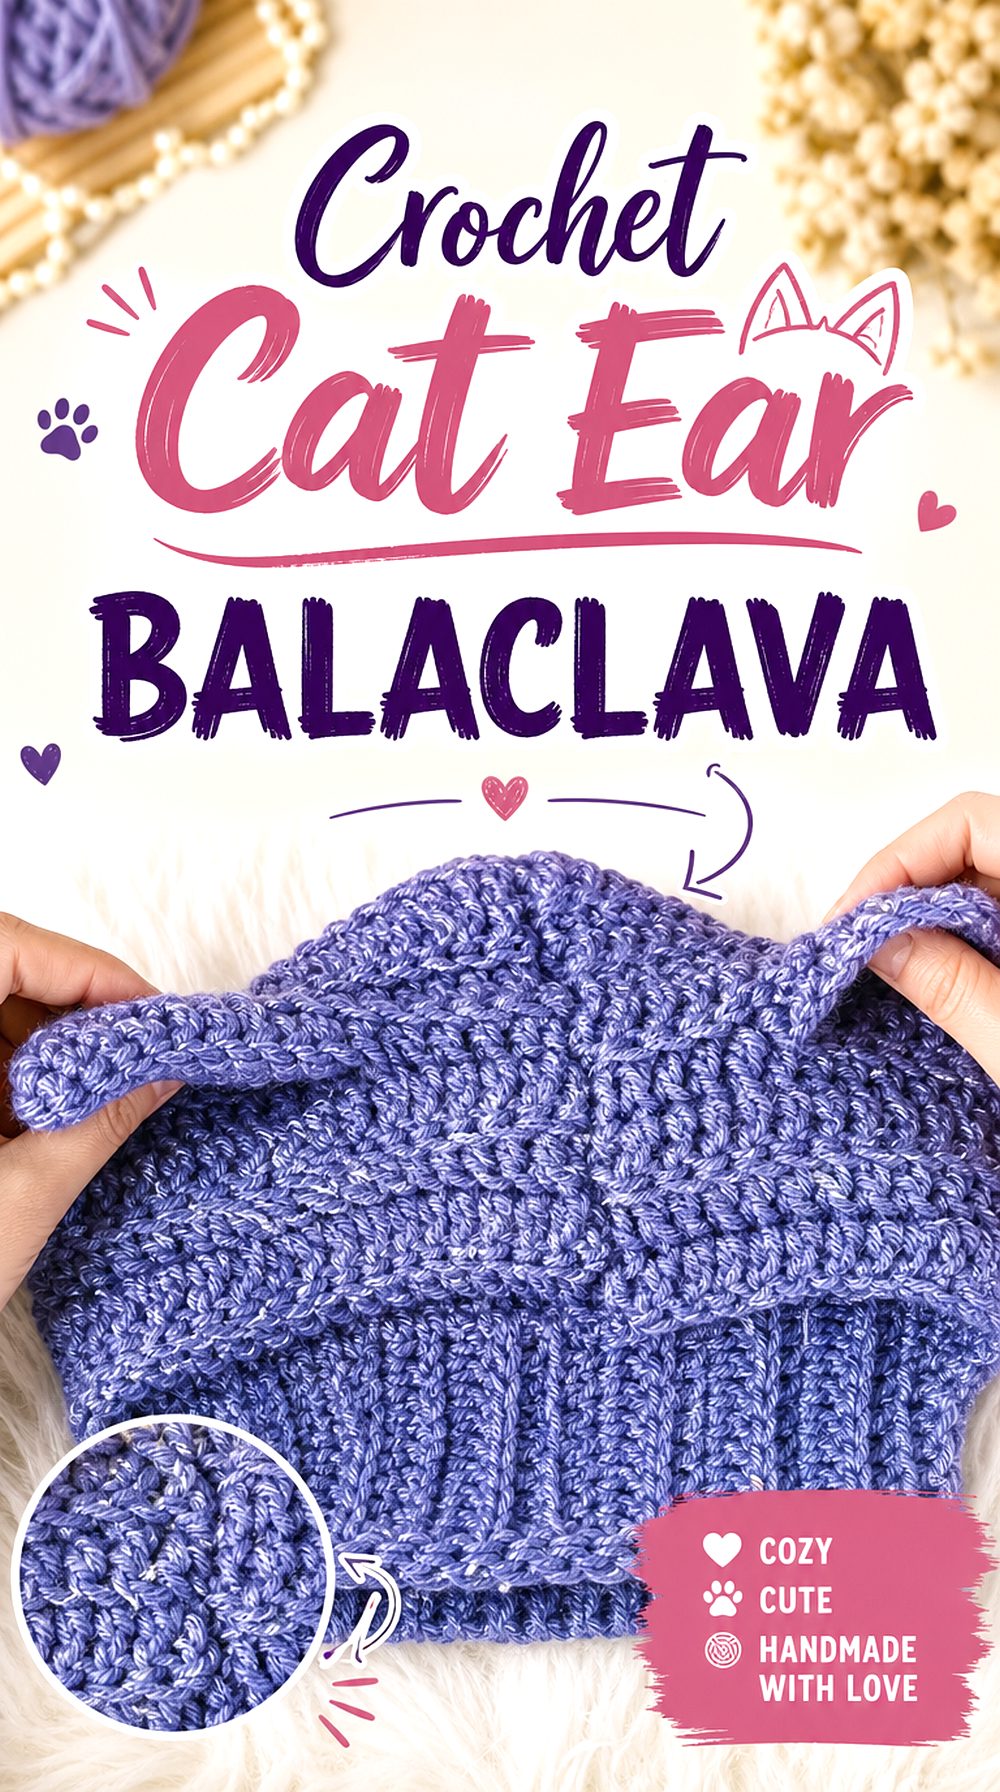
The cat ear balaclava brings a playful shape into the list while still keeping the basic hood function. The pointed ear pieces sit at the top, making the finished item more expressive than a plain winter hood.
This project is clearly different from the granny square and turtleneck styles because the main design feature is silhouette. It may suit readers who want a wearable accessory with a character-like detail, while still checking the fit around the face and neck before starting.
Check the Ear Shape
The ears are the defining feature of this balaclava, so readers should look closely at their size, placement, and angle in the finished view. Small changes in attachment can make ears look upright, soft, or slightly folded. Anyone choosing this style should be ready to spend attention on symmetry rather than treating the ears as an afterthought.
Compare the Hood Fit
A cat ear balaclava still needs the main hood to fit well. Readers should check how closely the hood sits around the head and whether the face opening appears comfortable for their preferred coverage. If the hood is too loose or too tight, the ears may not sit the way the finished example suggests.
Review the Attachment Stage
Because the ears are added as a visible feature, the attachment stage matters. Readers should use the original tutorial for the exact placement and avoid guessing from the final photo alone. It is also worth checking whether the creator shows the front and side views clearly enough for confident positioning.
Original Tutorial and Creator Credit
Creator: Cherilyn Q
5. Crochet Bear Ear Hooded Scarf Balaclava
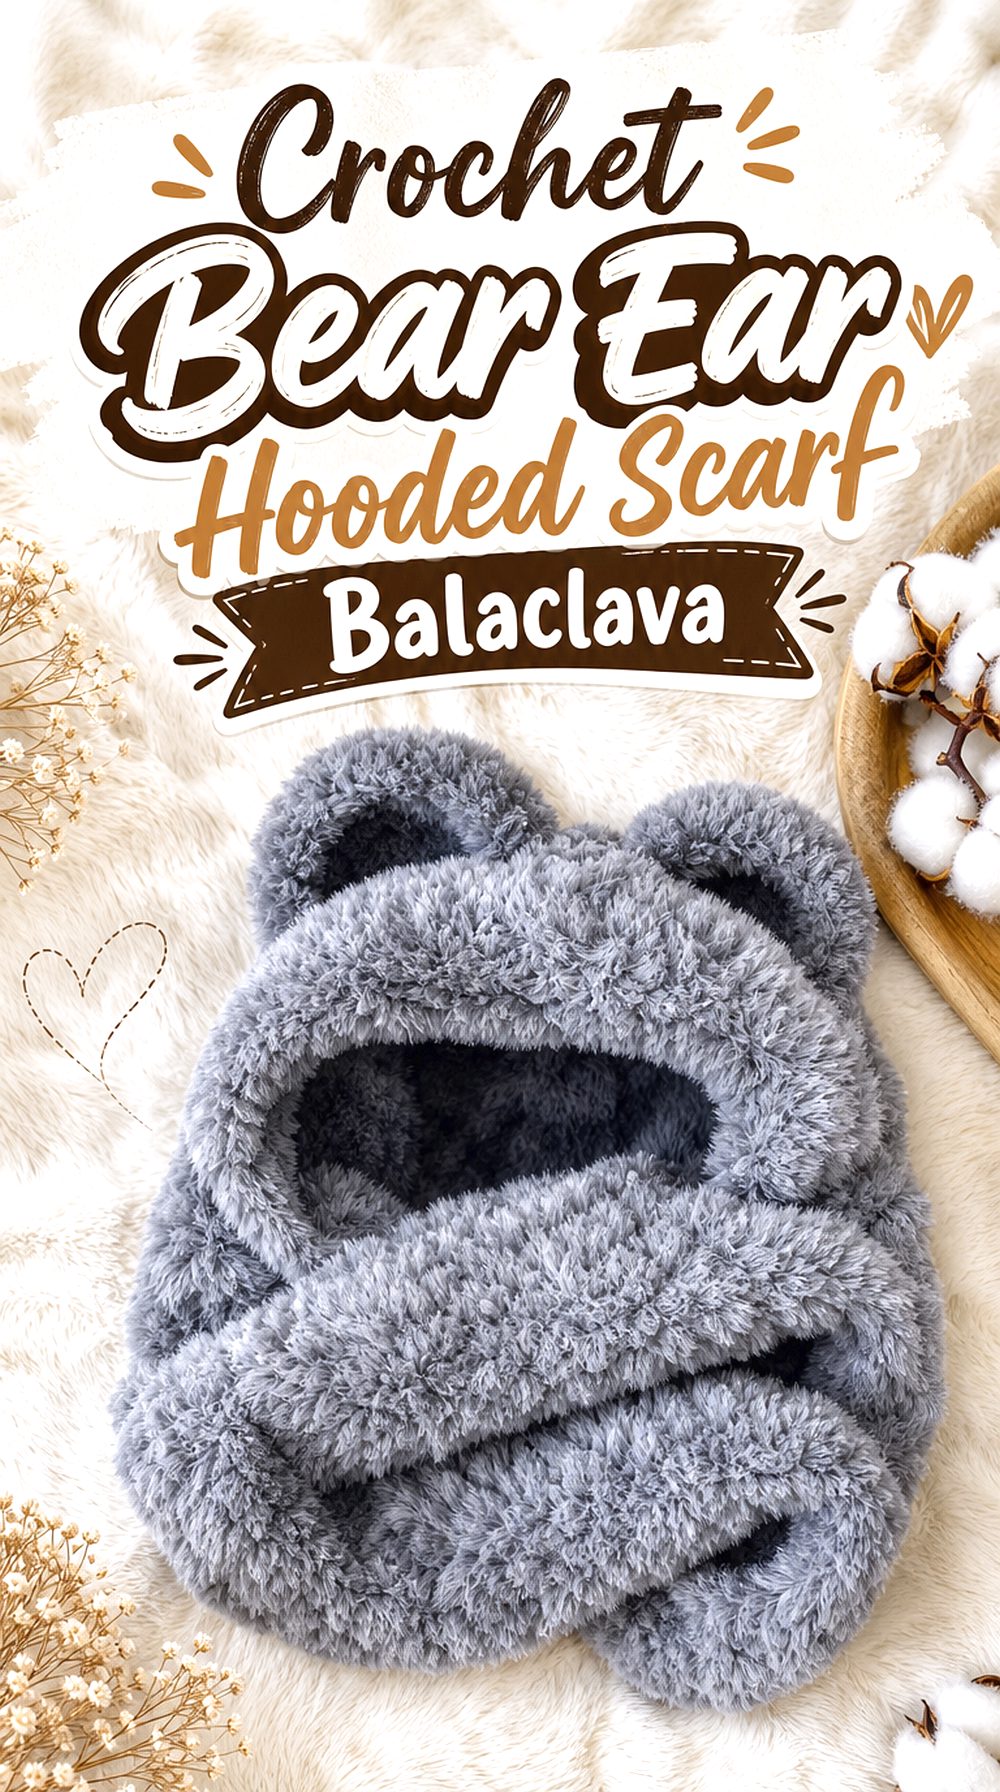
This bear ear version leans more toward a cozy hooded scarf or neck warmer than a plain close-fit balaclava. The rounded ears and fuller lower section give it a softer, more bundled shape, especially compared with the sharper cat ear design.
Readers who want extra neck coverage may find this type of project useful to study. The finished style appears more playful and wrapped, so it belongs in a different category from the sleek classic hood or full ski-mask option.
Notice the Hooded Scarf Shape
The hooded scarf format changes how this balaclava is worn. Instead of focusing only on the head and face opening, readers should also consider how the lower section sits around the neck. This matters for layering because a fuller scarf-like base may need more space under jackets, coats, or high collars.
Check the Rounded Ear Detail
Bear ears usually depend on rounded shaping rather than sharp points, so their placement affects the whole mood of the project. Readers should compare both ears before finishing and check that they sit evenly from the front. A small difference in height or angle can be more visible on a simple hooded shape.
Confirm the Yarn Information
The source describes the project as using fluffy yarn, which affects the finished look and stitch visibility. Readers should confirm the creator’s material guidance before buying supplies because fuzzy textures can make details softer and less sharply defined. The original tutorial should be followed for the exact construction and finishing choices.
Original Tutorial and Creator Credit
Creator: Tommy’s sheep crochet and knitting
6. Crochet Full Ski Mask Balaclava
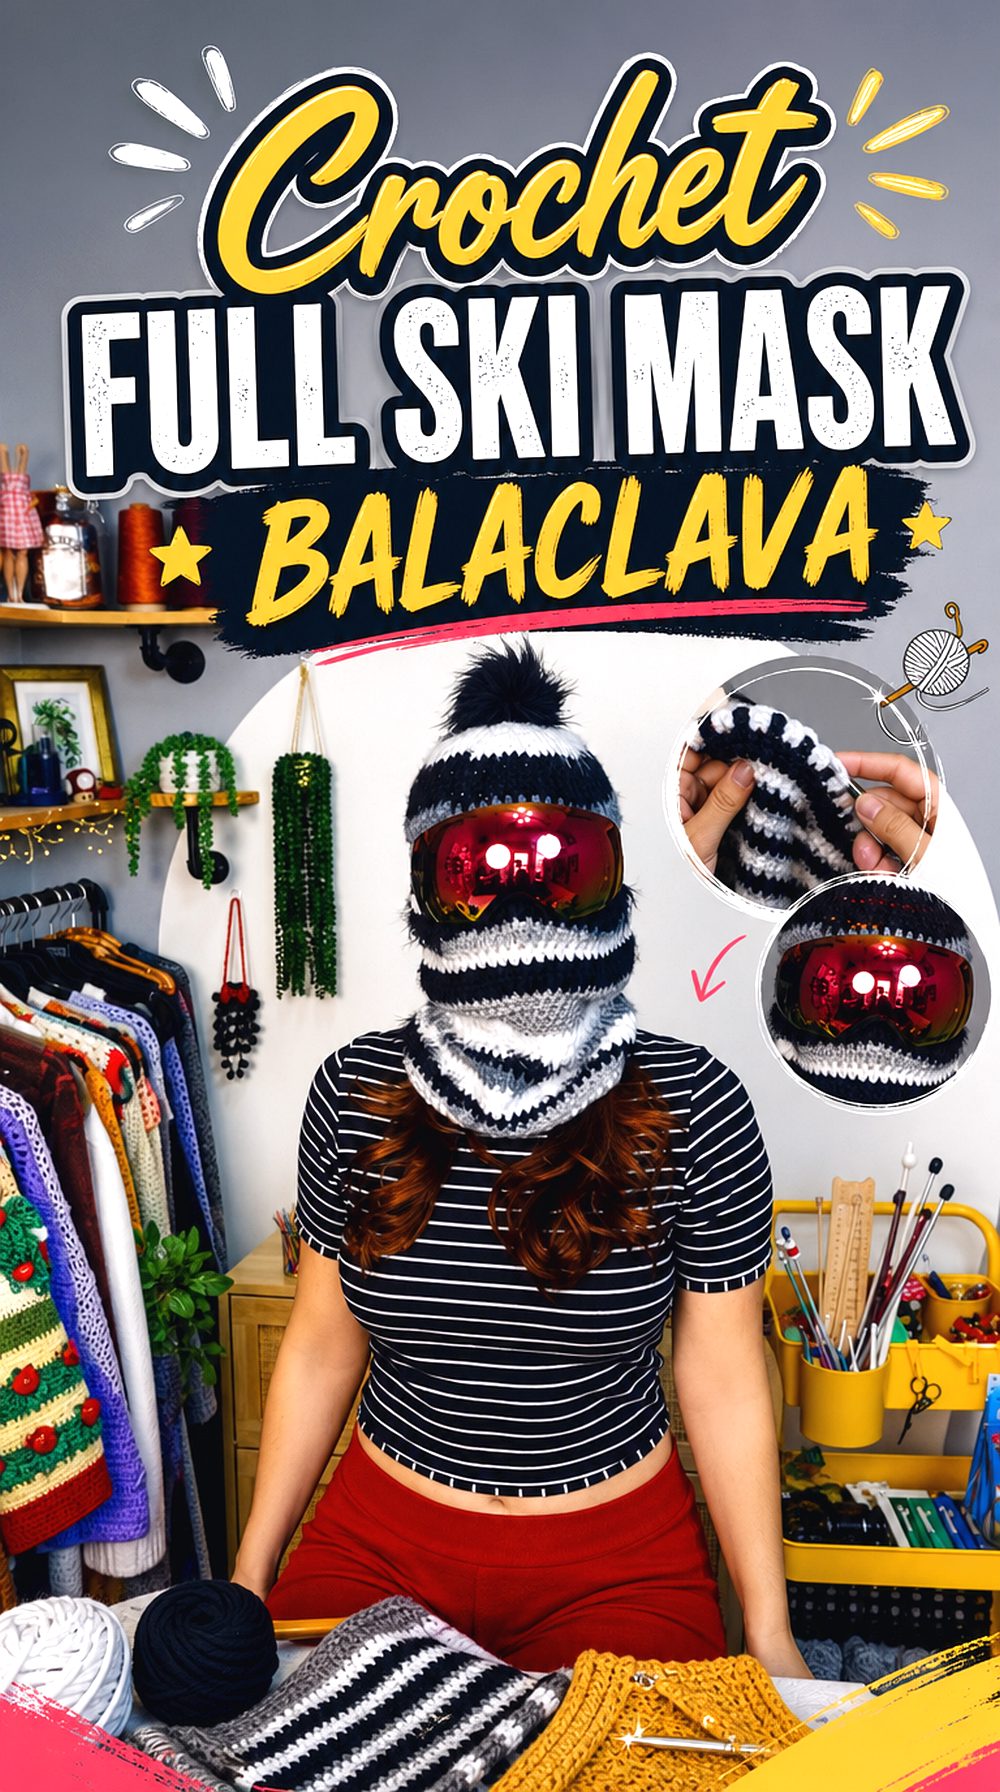
A full ski mask balaclava gives a much more covered look than the open-face hood styles. This type of project focuses on structured coverage around the head and face, with a defined opening and extra detail around the eye area.
It stands apart from the scarf-like and animal-ear versions because the finished result is more graphic and fitted. Readers who want a bold winter accessory should look carefully at the opening placement and overall coverage before choosing this project.
Study the Eye Opening
The eye opening is the central feature of a ski mask balaclava. Readers should check how wide it appears, where it sits on the face, and whether the final view matches the type of coverage they want. Because this design covers more of the face, small fit differences can affect both appearance and wearability.
Think About Shape Retention
A full ski mask style benefits from a neat finished shape, especially around the forehead, crown, and opening edge. Readers should look for how the finished piece holds its structure in the reveal. If a softer or drapier look is preferred, this may feel different from a loose hood or hooded cowl.
Slow Down Detailed Sections
This source separates the work into clear parts, including the neck, opening, forehead, crown, and finishing details. That structure can help readers pause at major shape changes. It is best to use the original tutorial for exact counts and shaping, rather than trying to recreate the mask from a written summary.
Original Tutorial and Creator Credit
Creator: Brunaticality
7. Crochet Turtleneck Hoodie Balaclava
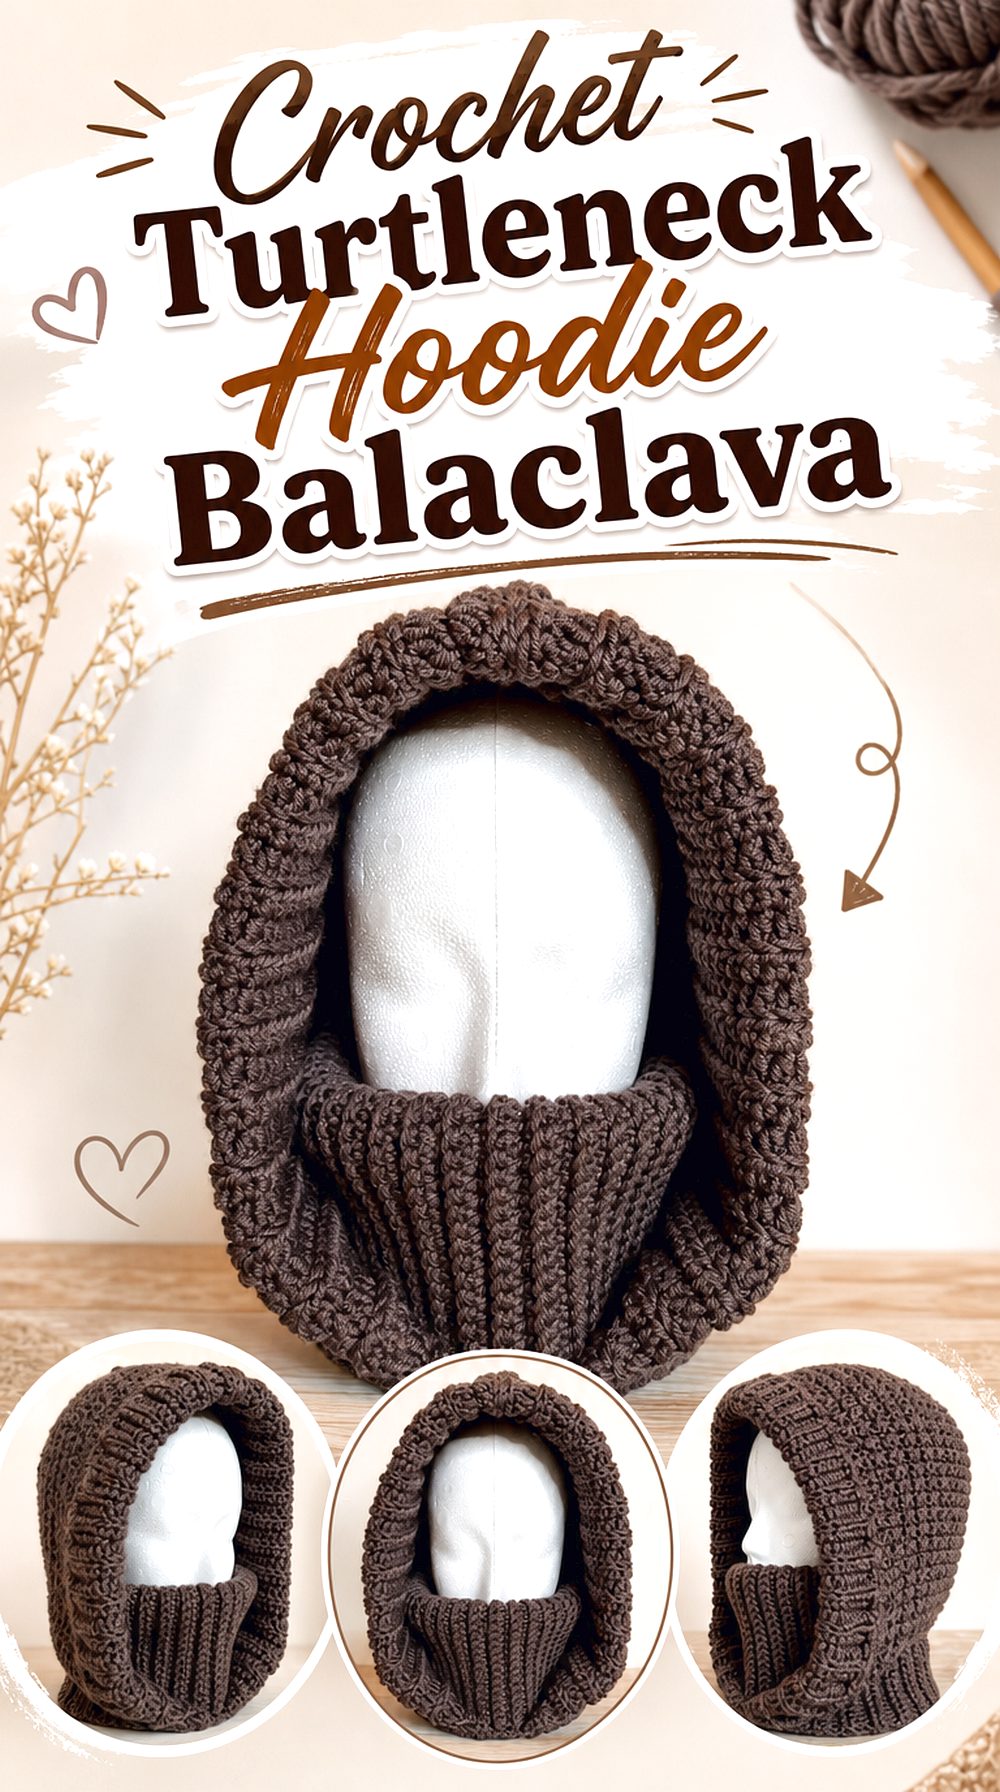
The turtleneck hoodie balaclava blends a hood, neck cowl, and winter layering piece into one shape. The higher neck section makes it feel more garment-like than a simple open-face balaclava, while the hood gives coverage without using separate scarf ends.
This option works well in a list because it shows how a balaclava can move toward a cowl silhouette. It is a useful contrast to the tie-front, motif, and ski-mask projects.
Consider the Turtleneck Height
The turtleneck section is the feature that sets this project apart from a standard hood. Readers should check how high the neck sits and whether the finished look matches their layering needs. A taller neck can appear more covered, while a shorter or softer cowl may feel less structured around the lower face.
Review the Size Guidance
The source notes that pattern sizing is available separately, and the tutorial includes adjustment discussion. Readers should review the creator’s size information before choosing materials, especially if they want a closer or looser fit. Wearable crochet projects depend on body measurements more than flat accessories, so checking fit notes matters.
Compare the Styling Views
A turtleneck hoodie balaclava can be styled more than one way, so finished views are useful. Readers should look at how the hood sits up, how the cowl looks at the neck, and whether the piece appears bulky under outerwear. Those views can help decide whether this shape fits the intended wardrobe.
Original Tutorial and Creator Credit
Creator: Diving Ducks Crochet
8. Crochet Ribbed Hooded Cowl Balaclava
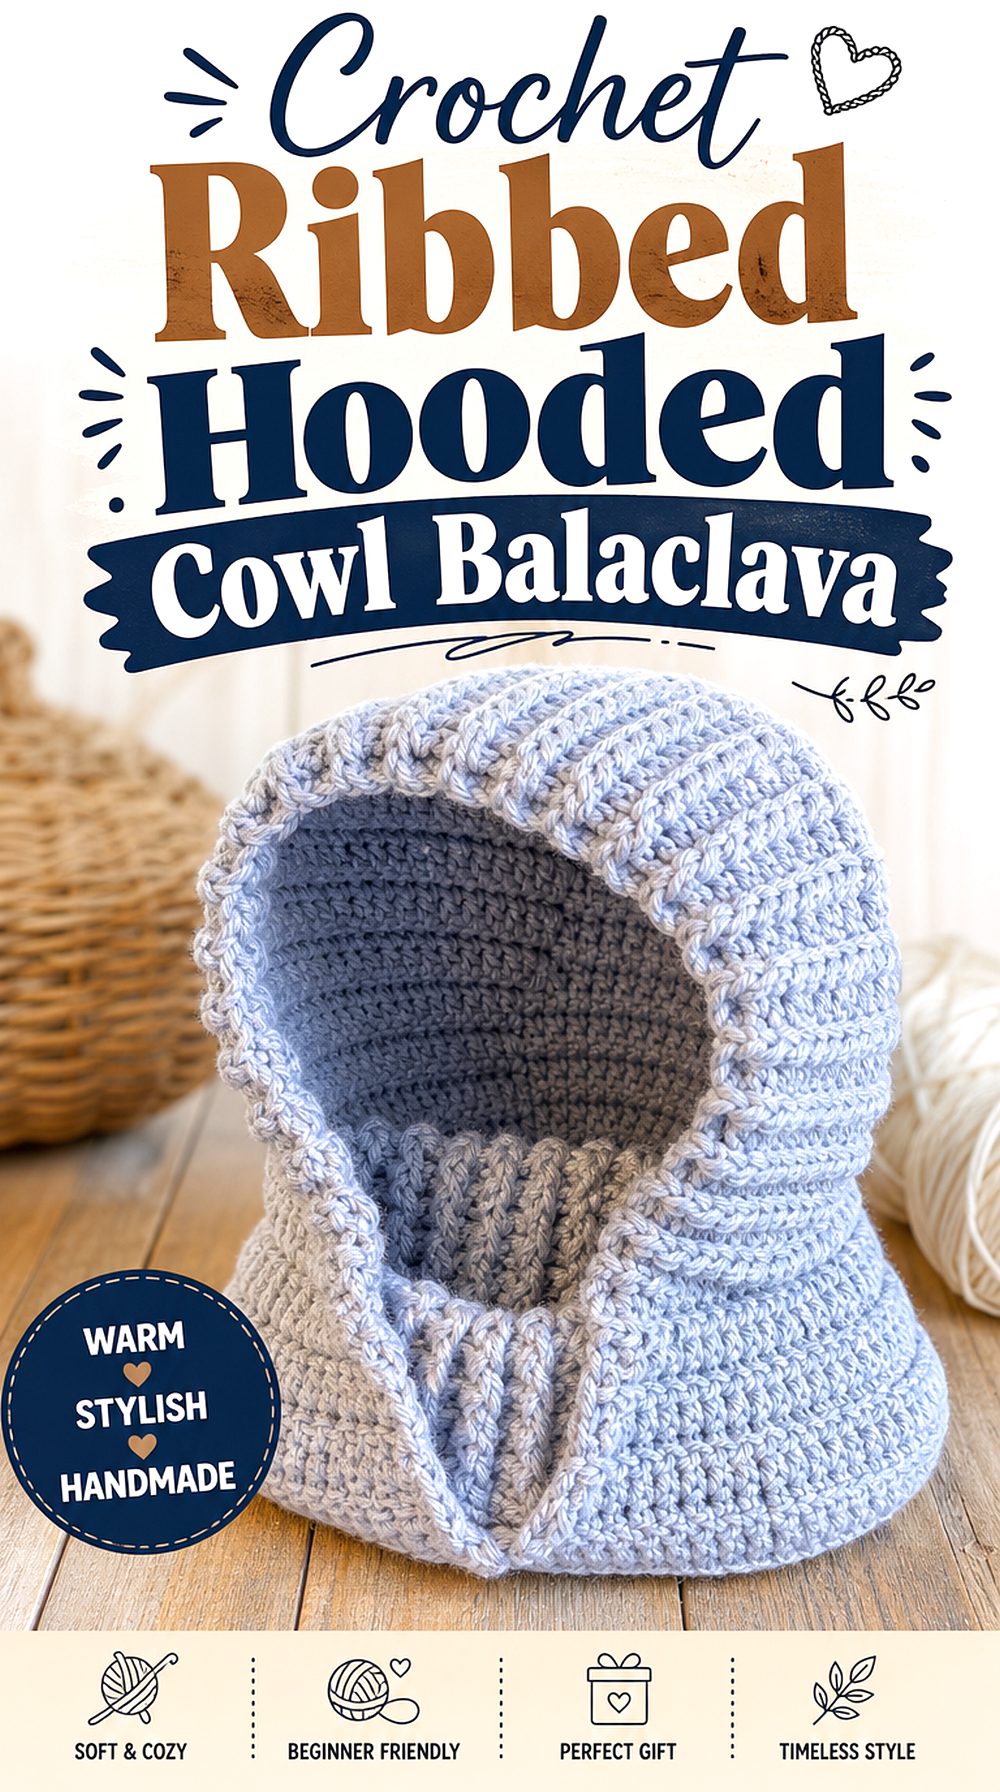
A ribbed hooded cowl balaclava puts texture and stretch at the center of the design. The ribbed lower section gives the piece a more defined neck-warmer feel, while the hood keeps the head covered in a single wearable layer.
This version is different from the smoother turtleneck hoodie because the ribbing is a major visual feature. It may suit readers who want a practical hooded cowl shape with visible texture rather than a playful ear detail or motif layout.
Look at the Ribbed Texture
The ribbing affects both the appearance and the way the neck section frames the finished piece. Readers should check whether they like the vertical texture before committing to this style. Ribbed crochet can look neat and substantial, but it also draws attention to the lower section more than a plain edge would.
Check the Size Range
The source describes sizing from toddler to adult in the broader pattern information, so readers should confirm which size they plan to follow before starting. This is especially important for family sets or gifts. A hooded cowl needs enough room around the head and neck, but it should not rely on guesswork.
Plan Around Layering
A ribbed hooded cowl can add visible thickness around the neckline. Readers should think about whether it will be worn over a sweater, under a coat, or as the main winter accessory. The finished shape should be compared with the wearer’s usual outerwear so the cowl section does not feel crowded.
Original Tutorial and Creator Credit
Creator: LisaAuch Crochet
9. Crochet Made to Measure Drawstring Balaclava
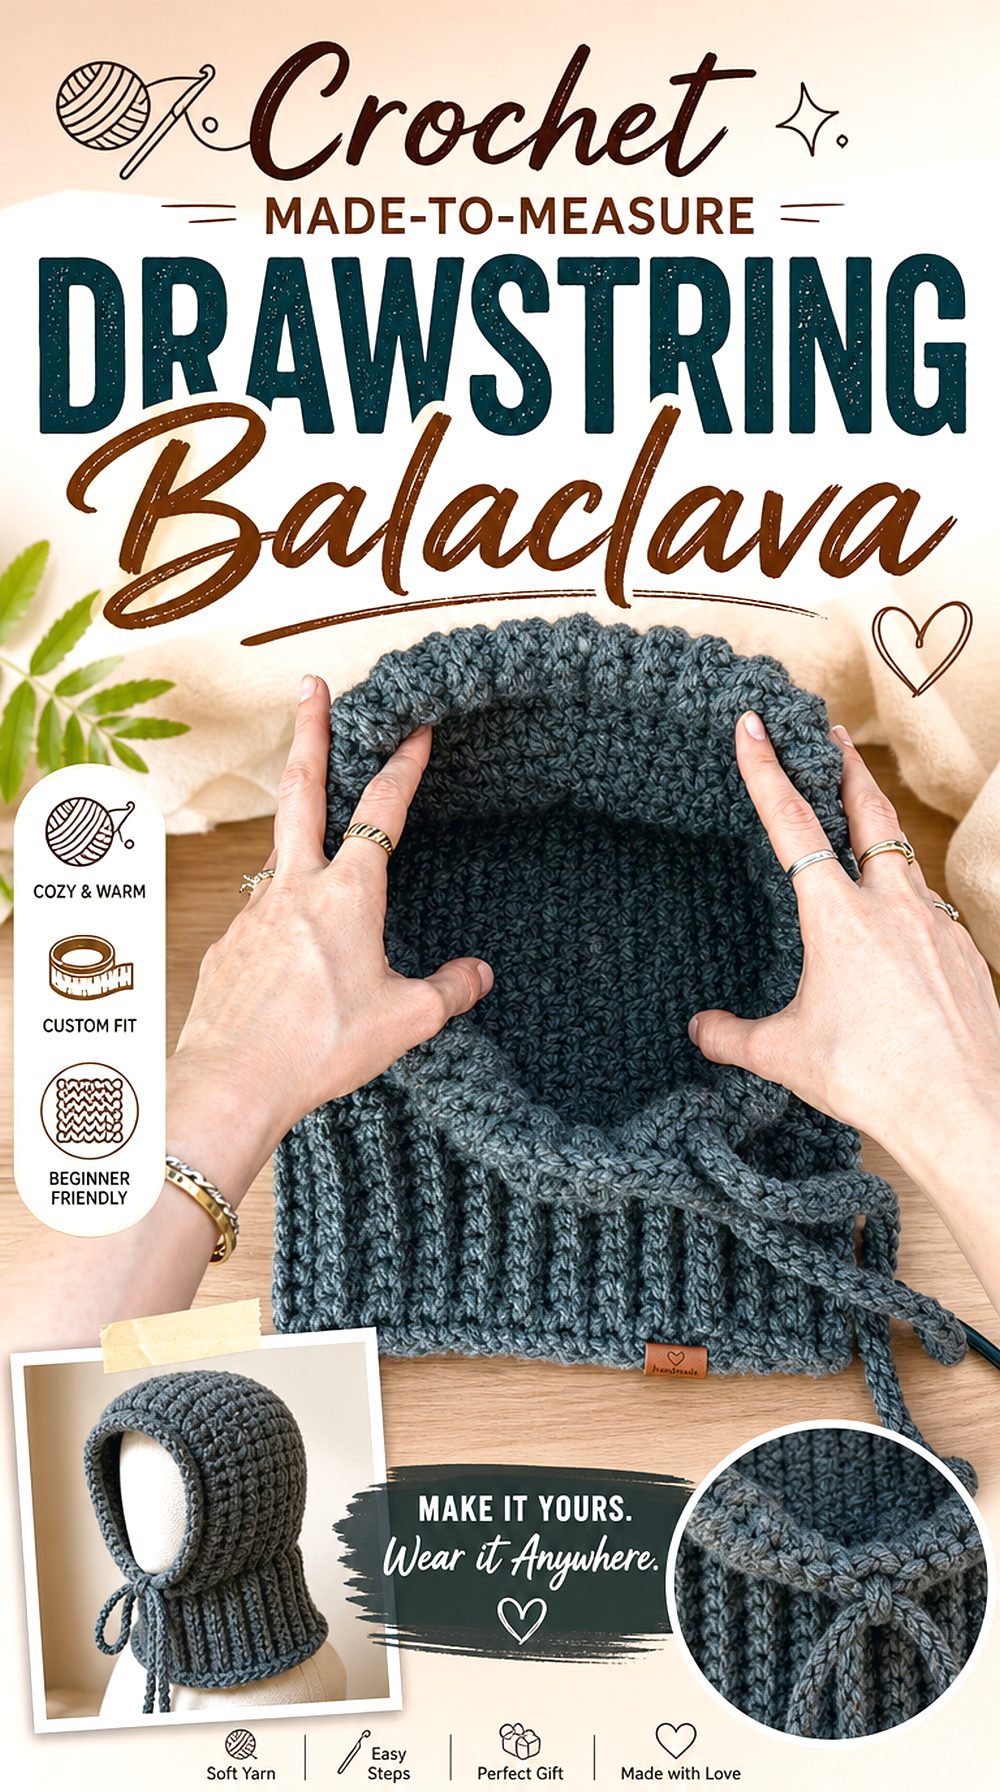
The made-to-measure drawstring balaclava focuses on fitting the hood to the wearer rather than relying only on a fixed finished size. The drawstring detail gives the face opening a practical finishing feature, while the tutorial structure includes separate areas for bottom ribbing, face ribbing, and the cord.
This project is useful for readers who want adjustability without choosing a full ski-mask look. It feels more controlled than a loose hood but less decorative than the animal-ear options.
Check the Made-to-Measure Approach
A made-to-measure project asks readers to pay attention to their own fit as they follow along. This can be helpful, but it also means careful checking is needed throughout the process. Readers should not assume another person’s finished size will work for them; the original tutorial should guide the fit decisions.
Review the Drawstring Function
The drawstring affects the face opening, so it is worth checking how it looks in the finished piece. Readers should consider whether they want the cord to be a visible design detail or a subtle adjustment feature. The placement and finishing should be followed from the source rather than guessed from the final view.
Note the Sewing Level
The source describes the project as using minimal sewing, but there is still finishing involved. Readers who prefer almost no assembly should review those sections before starting. It is better to know where the top, ribbing, and face edge are finished than to discover late in the project that more sewing is required.
Original Tutorial and Creator Credit
Creator: Natalie
10. Crochet Scarf Style Balaclava Hood
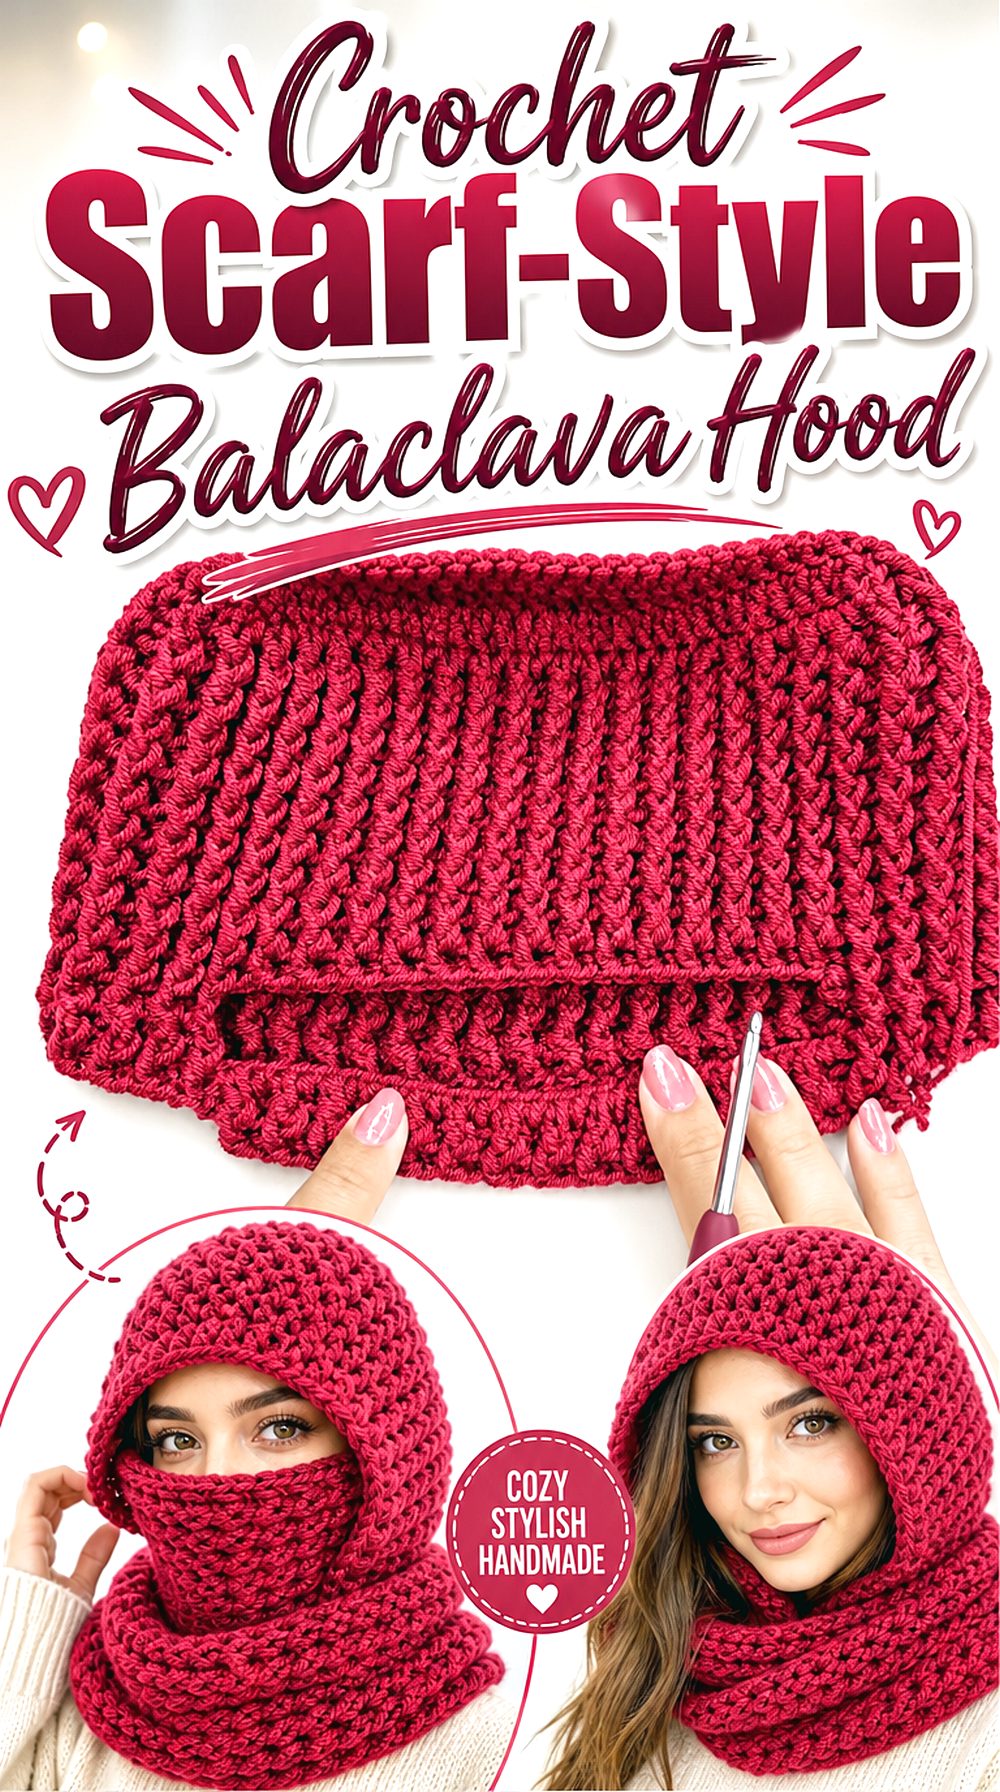
A scarf-style balaclava hood gives the collection a softer wrapped option. The source describes the project as a scarf and balaclava, so the finished idea sits between a hood, a neck warmer, and a winter accessory with more lower coverage.
This style is different from the close-fit and ski-mask versions because it does not rely only on face framing. It may appeal to readers who want a hooded piece that feels closer to a scarf while still covering the head.
Think About the Wrapped Shape
The scarf-style structure can change how the balaclava sits around the shoulders and neck. Readers should check the finished view to see whether the lower section looks compact or more generous. That decision matters if the piece will be worn under a coat, over a sweater, or as the visible outer layer.
Confirm Language and Captions
This tutorial title notes English subtitles, which is useful for readers who need translation support. Before starting, viewers should check whether the subtitles, captions, or on-screen guidance are clear enough for their learning style. A complete tutorial can still feel harder to follow if the language format is not comfortable.
Match It to Intended Use
A scarf-style balaclava may be chosen for coverage, styling, or cold-weather layering. Readers should decide whether they want a neat hood, a fuller neck wrap, or a piece that visually replaces a separate scarf. That choice can help them decide whether this final option is a better fit than the cowl or classic hood.
Original Tutorial and Creator Credit
Creator: BUENOS DÍAS CROCHET ♥️
Conclusion
These crochet balaclava ideas cover several useful directions: a simple close-fit hood, an adjustable tie-front shape, a granny square motif version, playful ear designs, fuller scarf-style coverage, and more structured ski-mask or turtleneck cowl options. Readers who want clean everyday layering may prefer the classic, made-to-measure, or ribbed cowl styles. For stronger visual detail, the granny square, cat ear, bear ear, and ski mask projects stand out more. Use the original tutorials for exact construction details before beginning.
FAQs
How do I choose the right crochet balaclava style?
Start with the coverage you want. A classic hood gives a simpler outline, a ski mask covers more of the face, and a cowl or scarf-style balaclava adds more neck warmth. If appearance matters most, compare motif placement, ear shapes, ties, and ribbed texture before choosing a tutorial.
What should I check before starting a crochet balaclava tutorial?
Check the creator’s material list, hook information, size notes, finished views, and any written pattern links. For wearables, fit matters more than it does for flat projects. It also helps to preview the face opening, neck depth, and finishing sections before buying yarn or cutting ends.
Are crochet balaclavas one-size-fits-all?
Not always. Some tutorials are made to measure, while others provide specific measurements or separate size information. A balaclava needs to fit the head, face opening, and neck comfortably, so readers should compare the creator’s sizing guidance with the intended wearer before choosing a project.
Can I change the yarn for a crochet balaclava?
A yarn change can affect size, drape, thickness, stitch definition, and how the face opening sits. Readers should follow the creator’s material guidance when possible and check the yarn label for care information. If using a different yarn, confirm gauge or fit guidance from the tutorial first.
Can I sell a crochet balaclava made from a YouTube tutorial?
Do not assume selling is allowed. Check the creator’s video description, written pattern terms, shop listing, or licensing notes before selling finished items. Some creators allow personal use only, while others may allow sales with conditions. Local labeling, safety, and business rules may also apply.


