12 Crochet Poncho Ideas for Layering, Coverage, and Shape Variety
Crochet ponchos can look very different depending on the neckline, body shape, length, edge finish, and amount of coverage. Some sit like soft rectangles, some open like ruanas, and others feel closer to a hooded outer layer or a cozy neck-warming wrap.
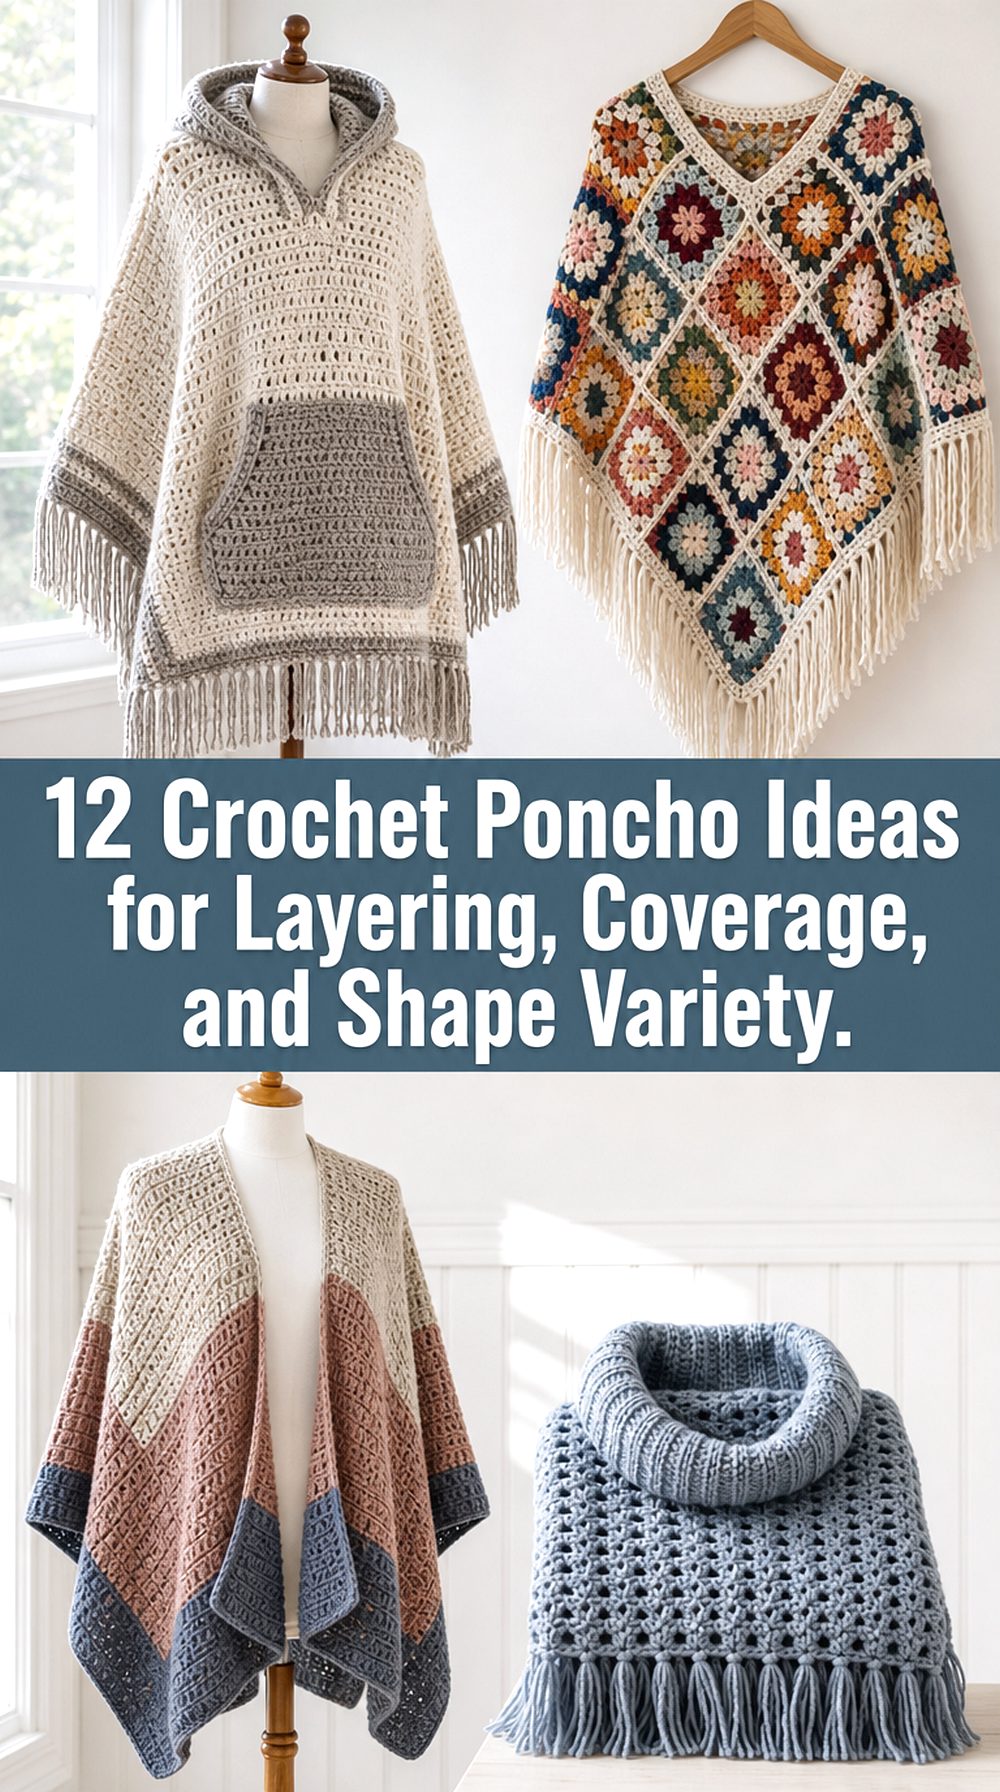
This list brings together twelve different crochet poncho ideas so readers can compare the finished shape before choosing a tutorial. The mix includes airy mesh, granny square construction, a pocketed hood, buttoned styling, cowl and turtleneck necklines, a child-size option, and an asymmetrical fringe design. Each one gives a different reason to make a poncho, from simple layering to a more defined statement piece.
Quick List
- Crochet Simple Rectangle Poncho
- Crochet Clean V-Front Everyday Poncho
- Crochet Granny Square Flower-Field Poncho
- Crochet Hooded Poncho With Pocket
- Crochet Mesh Poncho With Tassels
- Crochet Buttoned Shawl-Style Poncho
- Crochet Lightweight Eyelet Poncho
- Crochet Cowl Neck Layering Poncho
- Crochet Turtleneck Cold-Weather Poncho
- Crochet Color Block Ruana Poncho
- Crochet Child-Size Cozy Poncho
- Crochet Asymmetrical Fringe Poncho
Why These Crochet Poncho Projects Are Worth Making
Ponchos are useful crochet garments because they let makers think about coverage without the same sleeve fit decisions required by many sweaters or cardigans. A loose rectangle poncho may be chosen for simple layering, while a hooded version can feel more like outerwear. A ruana gives an open-front shape, and a cowl or turtleneck changes how the finished piece sits near the face and shoulders.
This category also leaves room for color planning. Granny squares, color blocks, mesh rows, tassels, and fringe all affect the final look without turning every project into the same garment. Before starting, readers should compare the neckline, length, openness, size notes, and finishing details so the chosen poncho matches the way it will actually be worn.
1. Crochet Simple Rectangle Poncho
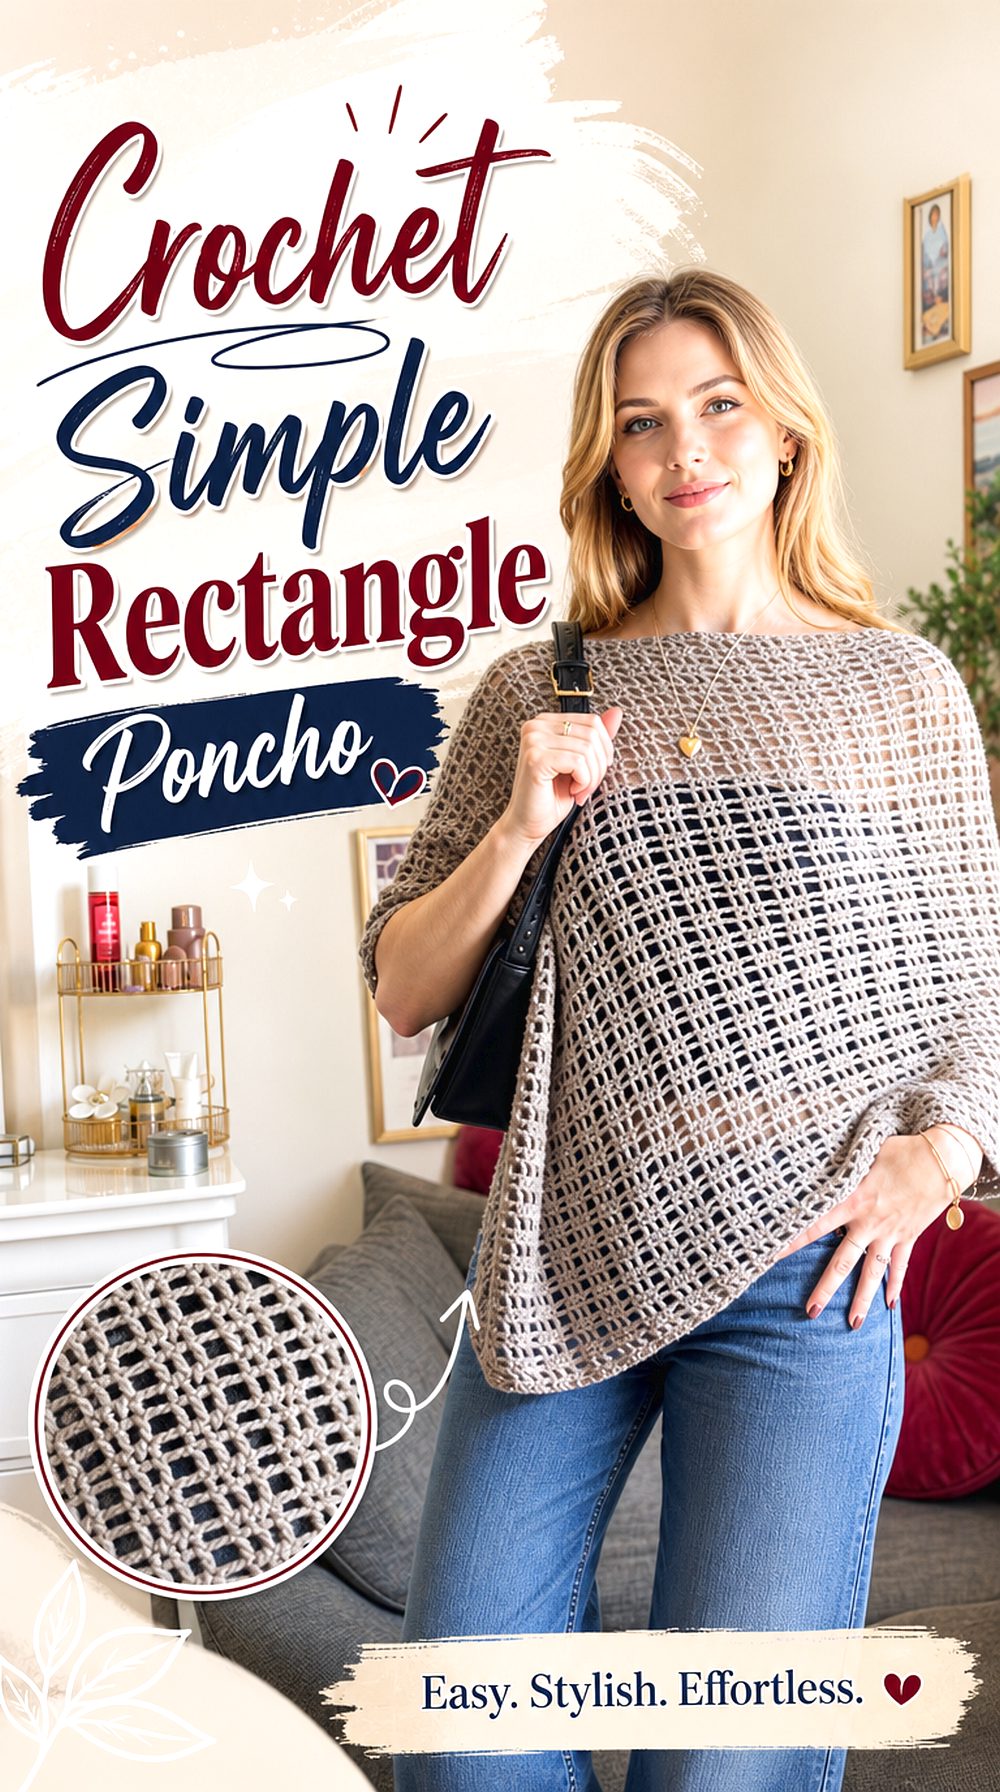
A rectangle-based poncho is a practical place to start when the goal is a clean shape without complicated garment pieces. The finished look depends on how the rectangle is positioned and joined, giving it a relaxed drape across the shoulders. This idea is different from the hooded, cowl, and ruana options because the focus is on a simple flat form that becomes wearable through shaping and placement.
It may suit readers who want to understand poncho construction clearly before choosing more decorative versions with pockets, squares, or fringe.
Check the Rectangle Shape
The rectangle shape matters because it controls how the poncho sits across the shoulders and where the lower edge falls. A simple shape does not automatically mean every finished size will suit every body. Readers should compare the creator’s finished view with their own preferred coverage, especially around the sides, front point, and shoulder width.
Confirm the Garment Length
Length is one of the most important checks for a rectangle poncho. A shorter result may feel more like a shoulder layer, while a longer one can cover more of the torso. Before choosing yarn or committing to a size direction, readers should look for any finished measurements or visible try-on views that show where the hem lands.
Compare the Shape as You Work
A rectangle poncho gives readers a clear chance to compare the fabric shape while it grows. The edges, corners, and overall drape should stay easy to follow visually. Marking a stopping point and checking the piece against the creator’s shape can help prevent continuing too far before realizing the final coverage is not what was intended.
Original Tutorial and Creator Credit
Creator: simplydaisy
2. Crochet Clean V Front Everyday Poncho
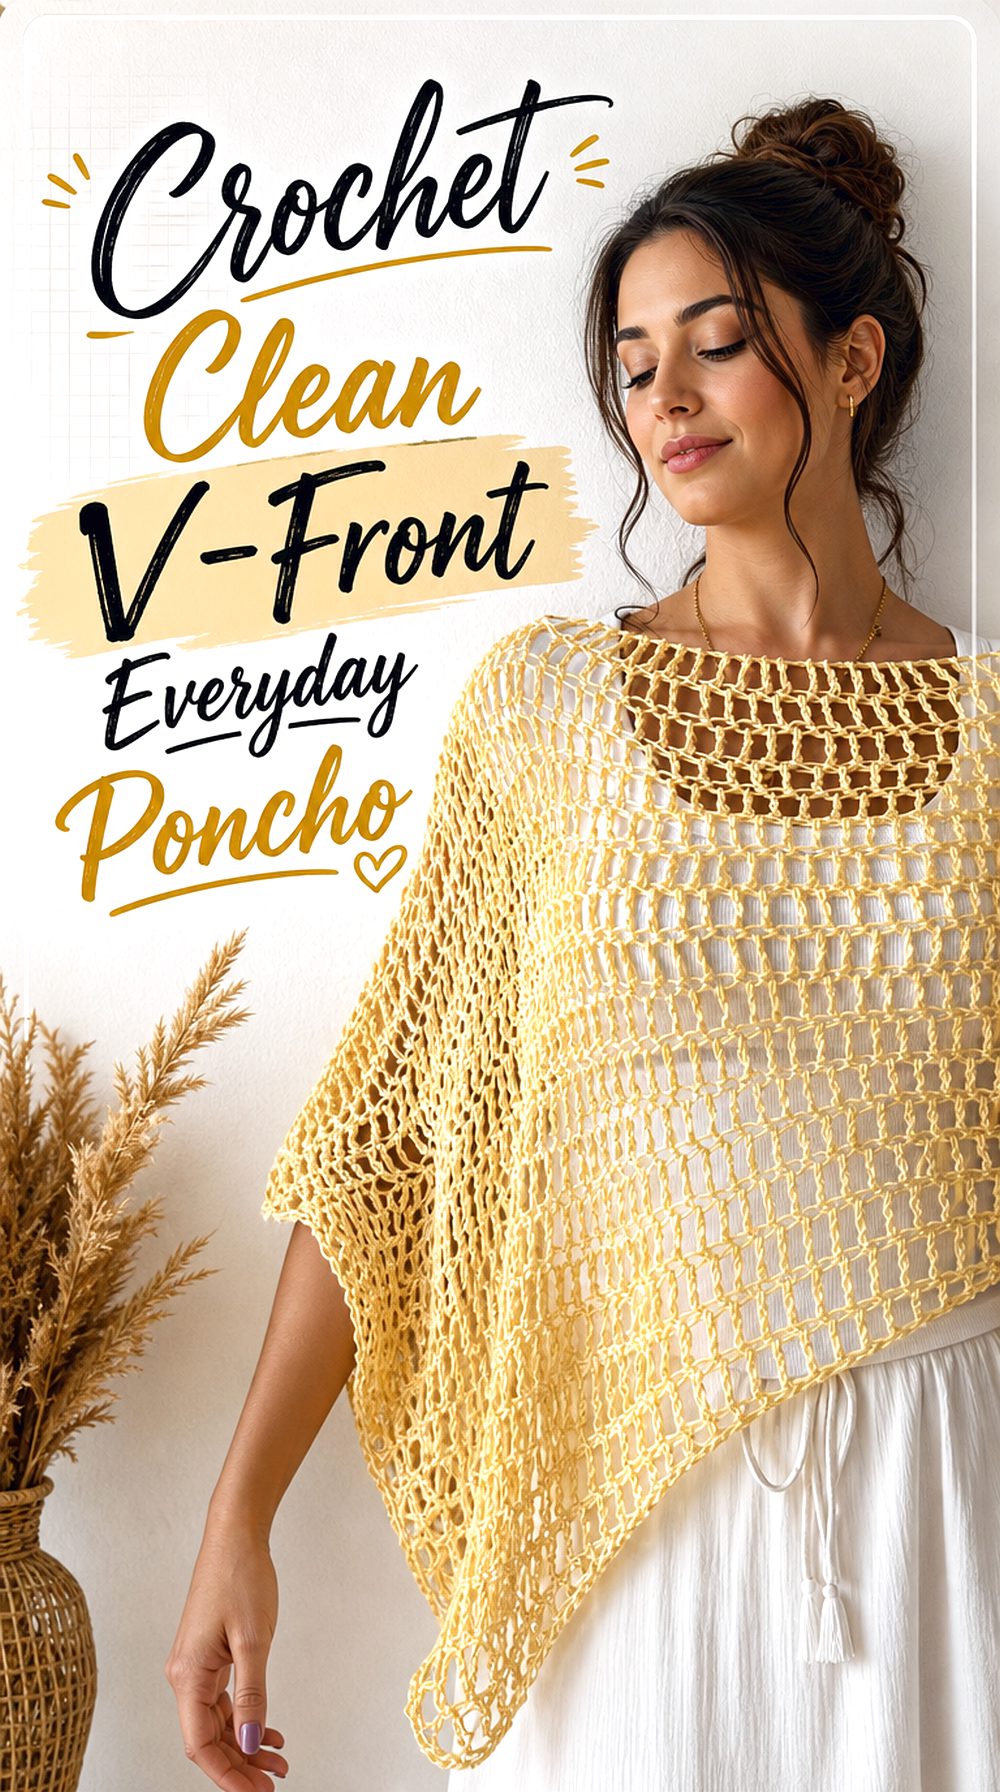
This poncho has a simple wearable look with a front shape that draws the eye downward instead of sitting like a straight wrap. The clean finish makes it useful for readers who want a poncho that can layer over everyday tops without too many extra details competing for attention.
It stands apart from the rectangle poncho because the finished styling looks more shaped at the front. Compared with the fringe and granny square projects, this option feels more focused on smooth coverage and a modern outline.
Look at the Front Shape
The front line is the main feature to study on this poncho. A V-like drop or centered point changes how the piece frames the upper body and how much coverage it gives at the chest. Readers should check the finished reveal closely to see whether the front hangs evenly and whether that shape matches their preferred layering style.
Think About Everyday Layering
A cleaner poncho works well as an everyday layer only when the neckline, sides, and length suit the clothes underneath. Readers may want to consider whether they plan to wear it over fitted tops, long sleeves, or lighter base layers. The open side area and front coverage should be checked before treating it as a regular wardrobe piece.
Review the Full Guide First
For a simple-looking poncho, the important decisions may happen in shaping, joining, or finishing rather than in obvious decoration. Watching the full guide before starting can help readers understand where the garment changes from flat fabric into a wearable shape. That preview is especially useful if the tutorial does not rely on many separate pieces.
Original Tutorial and Creator Credit
Creator: CIO Handmade
3. Crochet Granny Square Flower Field Poncho
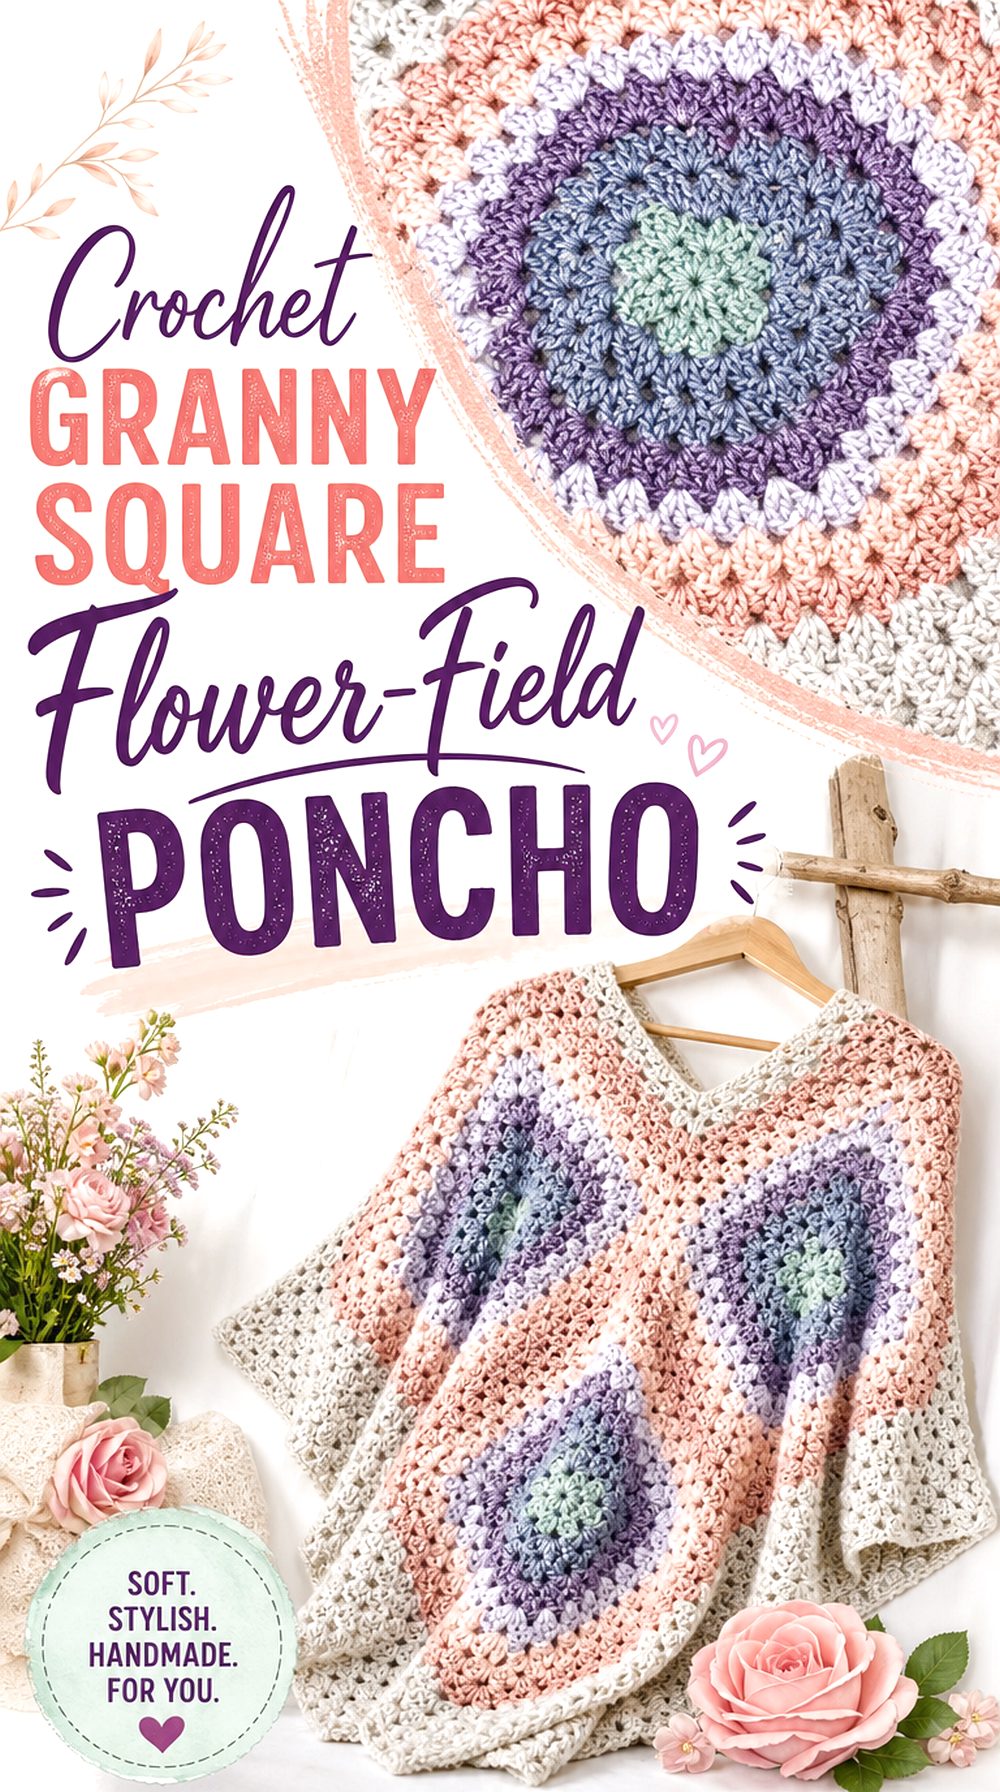
Large granny squares give this poncho a more graphic, patchwork-style look than the smoother rectangle and eyelet options. The visible square layout makes color placement part of the design, while the added neck and lower edging help the separate motifs read as one finished garment.
This project may interest readers who like ponchos with clear structure and visible blocks of color. It is less minimal than the everyday poncho and less open-front than the ruana, so the main appeal is the joined motif layout.
Plan the Square Layout
The square layout controls the whole personality of this poncho. Because the motifs are large and visible, color order and placement will affect the finished balance from the front and back. Readers should study the layout section carefully and decide whether they want high contrast, softer transitions, or a more limited color palette before making every square.
Watch the Joining Stage Closely
Motif ponchos depend on clean joining. The squares need to connect in a way that supports the neckline, shoulder area, and lower points. Readers should slow down during the joining stage and compare the orientation of each square before moving ahead. A careful check here matters more than it would on a one-piece poncho.
Check the Neck and Bottom Edges
The neck and lower edges help turn the square arrangement into a wearable poncho rather than a group of flat motifs. Readers should look at how the finished neckline sits and how much extra length the bottom edging adds. These details can affect both comfort around the neck and the final drape at the lower edge.
Original Tutorial and Creator Credit
Creator: Fiber Flux
4. Crochet Hooded Poncho With Pocket
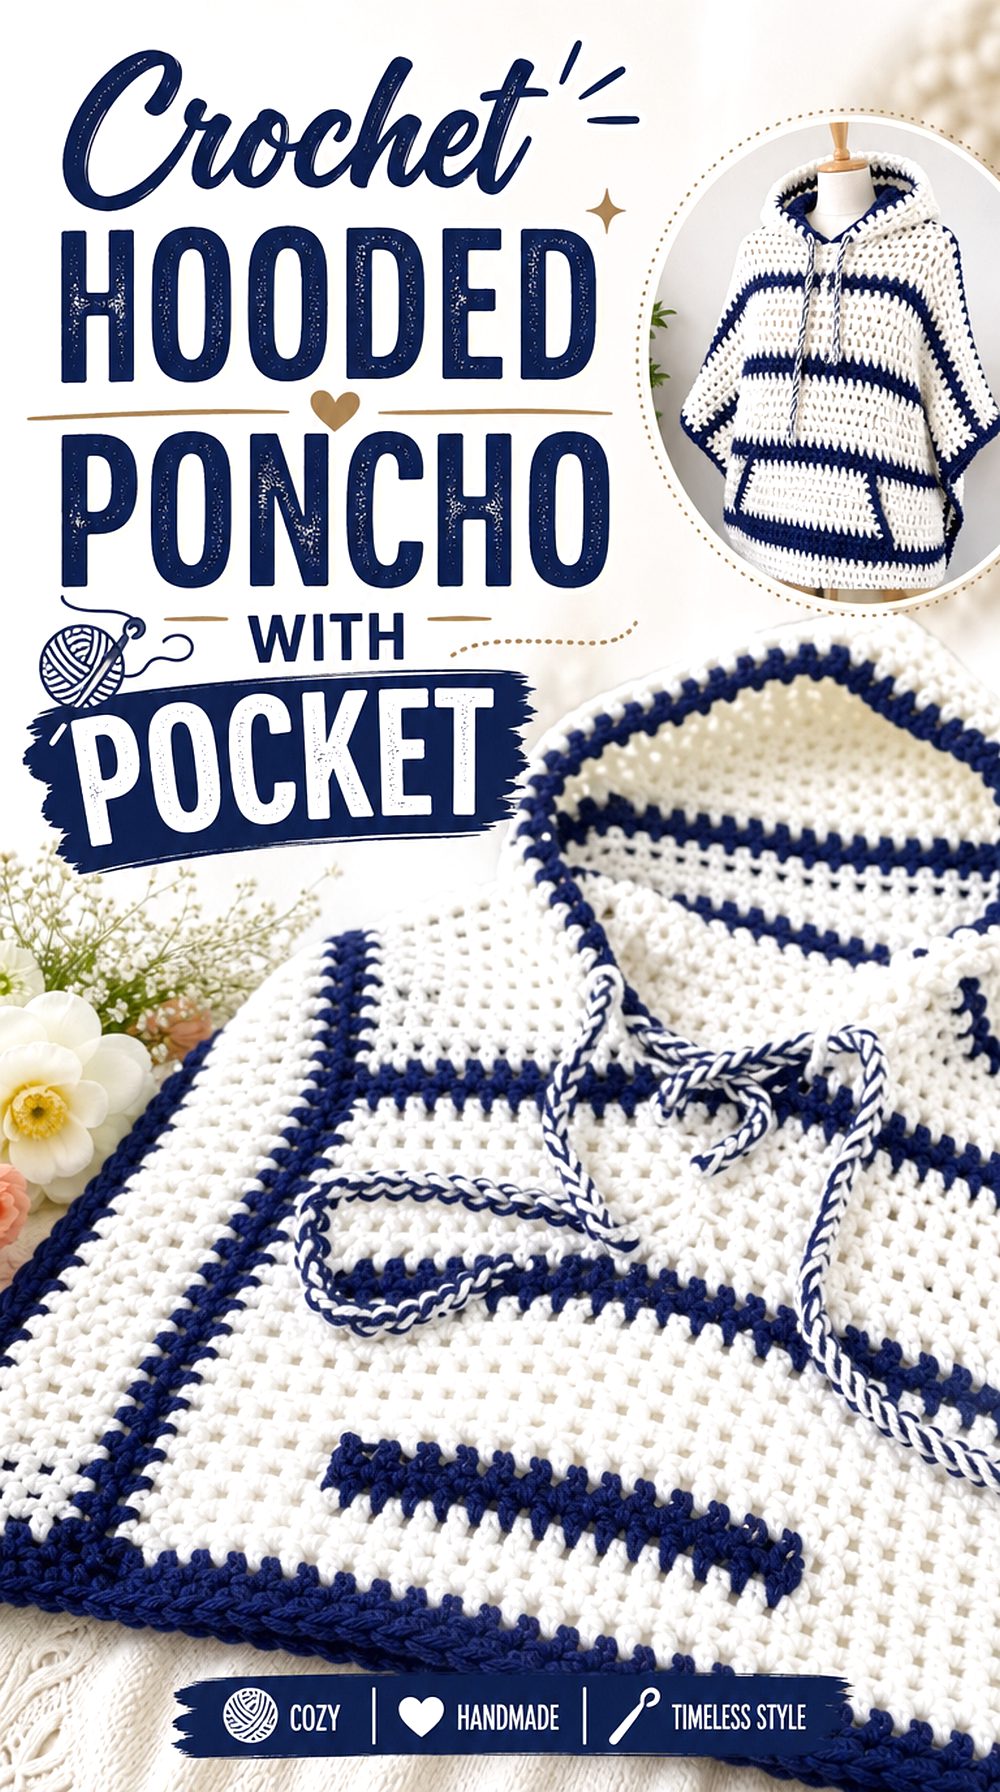
A hood, front pocket, ties, and fringe make this poncho feel closer to a casual outer layer than a plain shoulder wrap. The added features give readers more to evaluate before starting, especially if they want a poncho that has a defined front and a more covered upper body.
This idea is clearly different from the cowl and turtleneck versions because the neckline is shaped around a hood. It also differs from the ruana because the pocket and ties make the front feel more finished.
Check the Hood Shape
The hood is the feature that changes how this poncho wears. Readers should look for a clear finished view from the front and side to see how the hood sits when it is down and whether it looks roomy enough for their preference. Hood depth, neckline opening, and the way the hood meets the body are all worth checking.
Look at the Pocket Placement
A front pocket can be decorative, useful, or both, but its placement matters. A pocket set too high or too low may change the look of the whole garment. Readers should study where the pocket sits on the finished poncho and confirm whether the tutorial gives enough detail to place it neatly and evenly.
Confirm the Front Details
Ties and fringe add movement and texture, but they also add finishing decisions. Readers should check whether the ties are central to the closure or mainly decorative, and whether the fringe length fits their own wearing style. These details may affect how the poncho hangs and how much finishing time is involved.
Original Tutorial and Creator Credit
Creator: CrochetDreamz
5. Crochet Mesh Poncho With Tassels
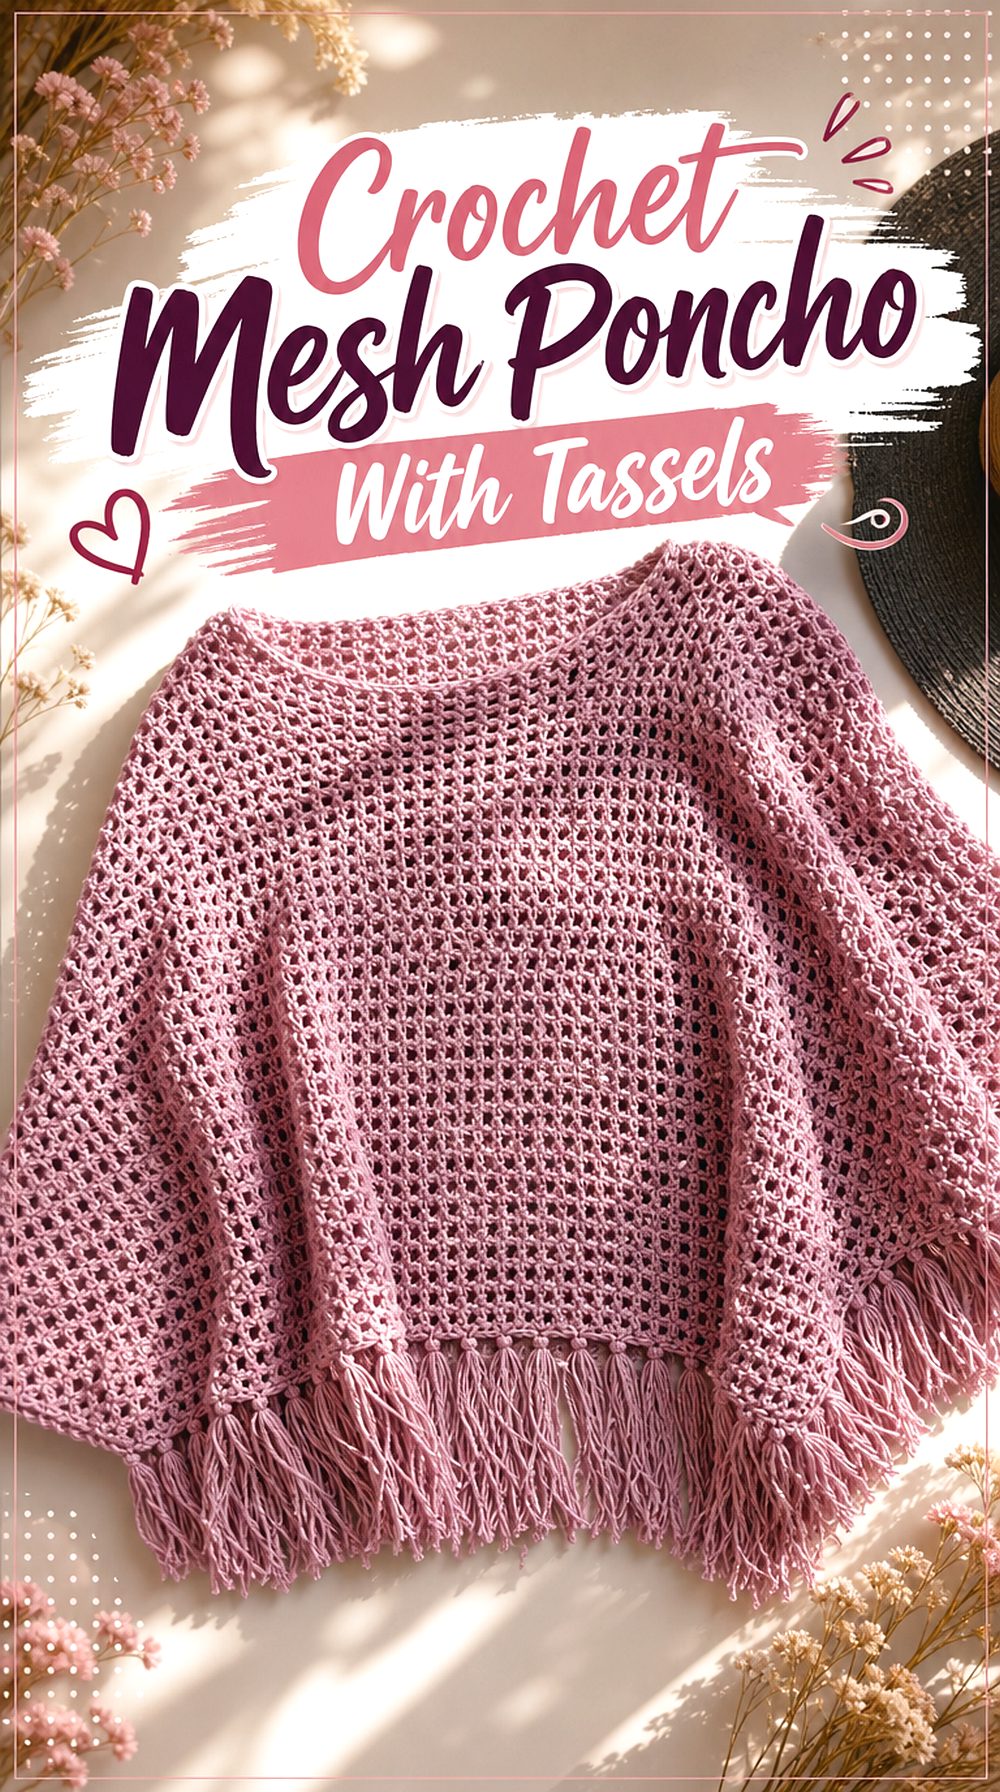
The mesh body and tassel finish give this poncho a lighter, more open look than the hooded or turtleneck styles. It may work best for readers who want a decorative layer rather than a dense covering piece. The open fabric makes the shape feel airy, while the tassels add movement at the lower edge.
This option stands apart from the eyelet poncho because the mesh is more visually open and the tassels become a key part of the final outline.
Think About Coverage
Mesh ponchos need a coverage check before starting. The open spaces can look light and pretty, but they may also mean the garment depends heavily on what is worn underneath. Readers should decide whether they want this as a beach-style layer, a decorative top layer, or a casual outfit piece before choosing colors and length.
Check the Tassel Finish
Tassels change the lower edge and can make a simple mesh poncho feel more finished. Readers should look at the final reveal to judge whether they like the length and placement of the tassels. It is also useful to confirm whether the tassel stage is included clearly enough for the look they want.
Mark Your Stopping Point
Because mesh fabric can grow visually without looking heavy, it is useful to mark progress and compare the length as it develops. Readers should avoid relying only on the flat shape. A poncho may hang longer once worn, so checking the drape during the process helps keep the final piece within the intended coverage range.
Original Tutorial and Creator Credit
Creator: Danielle Villanueva
6. Crochet Buttoned Shawl Style Poncho
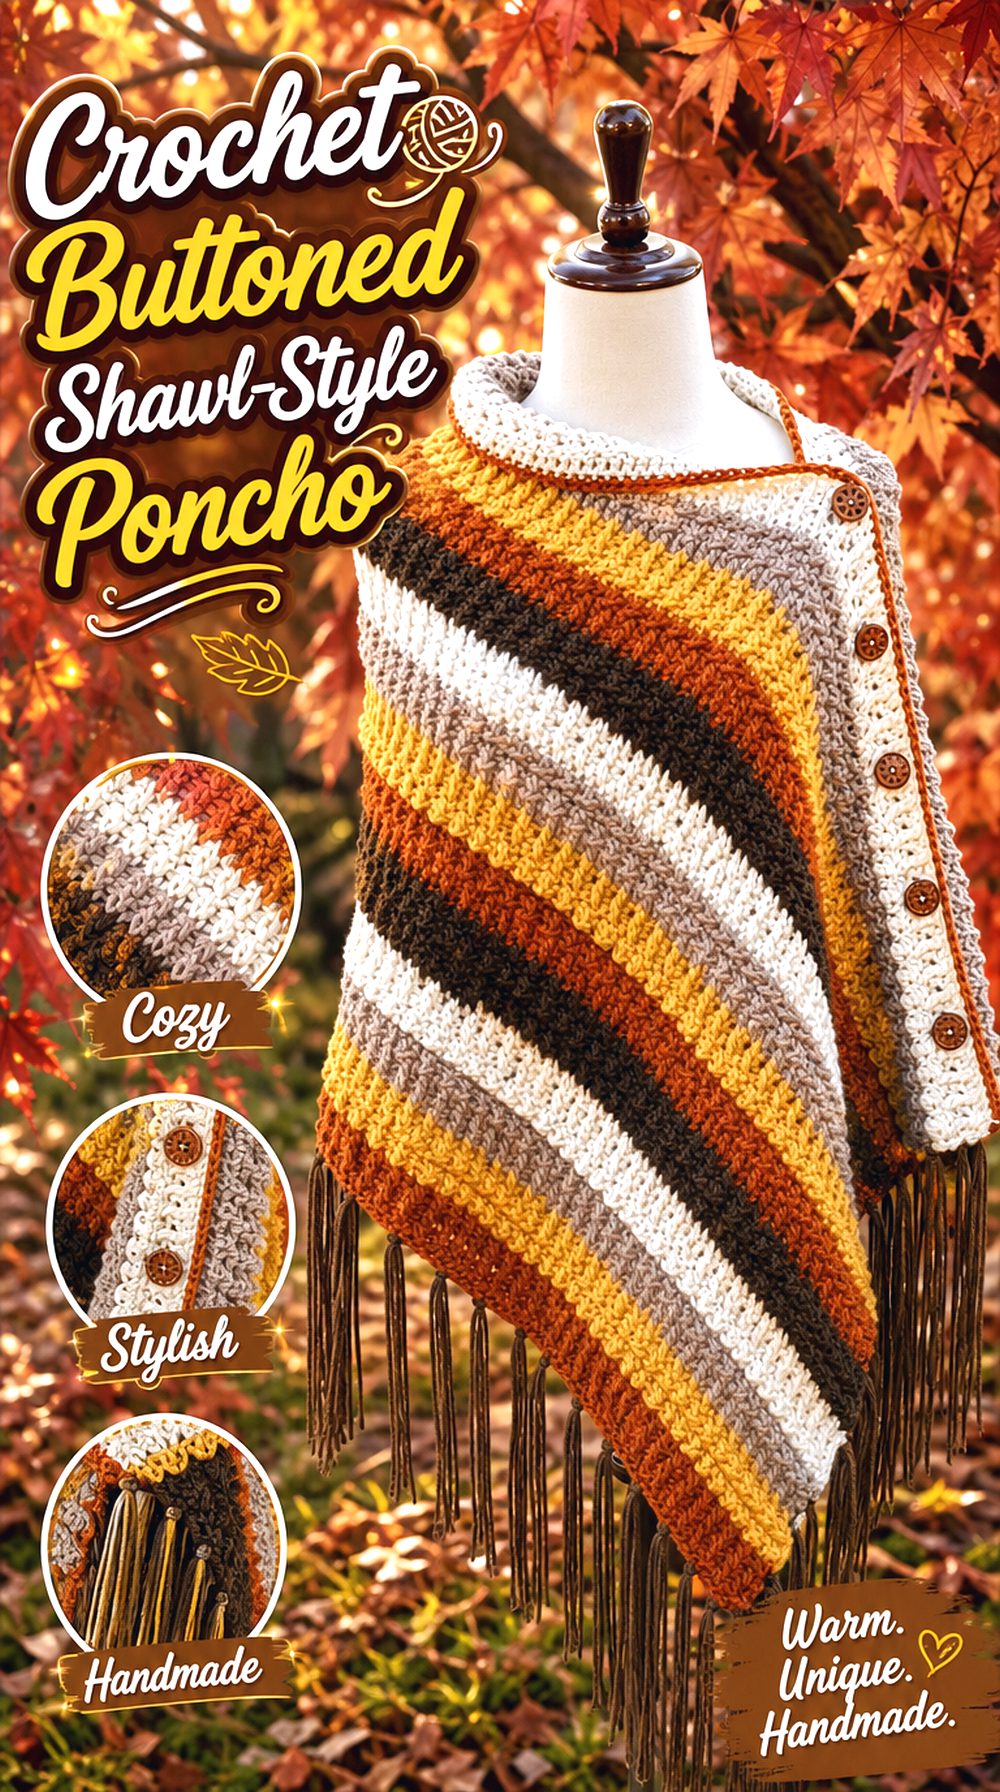
This design has a clever convertible quality: it can read as a rectangle shawl or become a poncho when buttoned. That makes it a useful idea for readers who like garments with more than one styling option. The button placement becomes just as important as the stitch texture because it affects how the piece closes and sits on the body.
Compared with the simple rectangle poncho, this version adds a closure decision. Compared with the ruana, it gives a more controlled front shape.
Look Closely at the Closure
The buttoned closure is the feature that turns this from a wrap-like piece into a poncho. Readers should pay attention to where the button sits, how the fabric overlaps, and whether the closure looks secure enough for their planned use. The same rectangle can feel very different depending on how it fastens.
Consider Two Wearing Modes
A shawl-style poncho may be chosen because it can be worn open or buttoned. Readers should decide which mode matters most before starting. If the poncho version is the priority, the closure and neckline need careful attention. If the shawl version matters more, the full rectangle shape and edge finish become more important.
Confirm Any Extra Components
Buttons or other closure pieces should be confirmed before buying supplies. Readers should check the creator’s material list and finished views so they know what is needed beyond yarn and basic crochet tools. The size, placement, and look of the button can affect both function and appearance.
Original Tutorial and Creator Credit
Creator: Bag-O-Day Crochet
7. Crochet Lightweight Eyelet Poncho
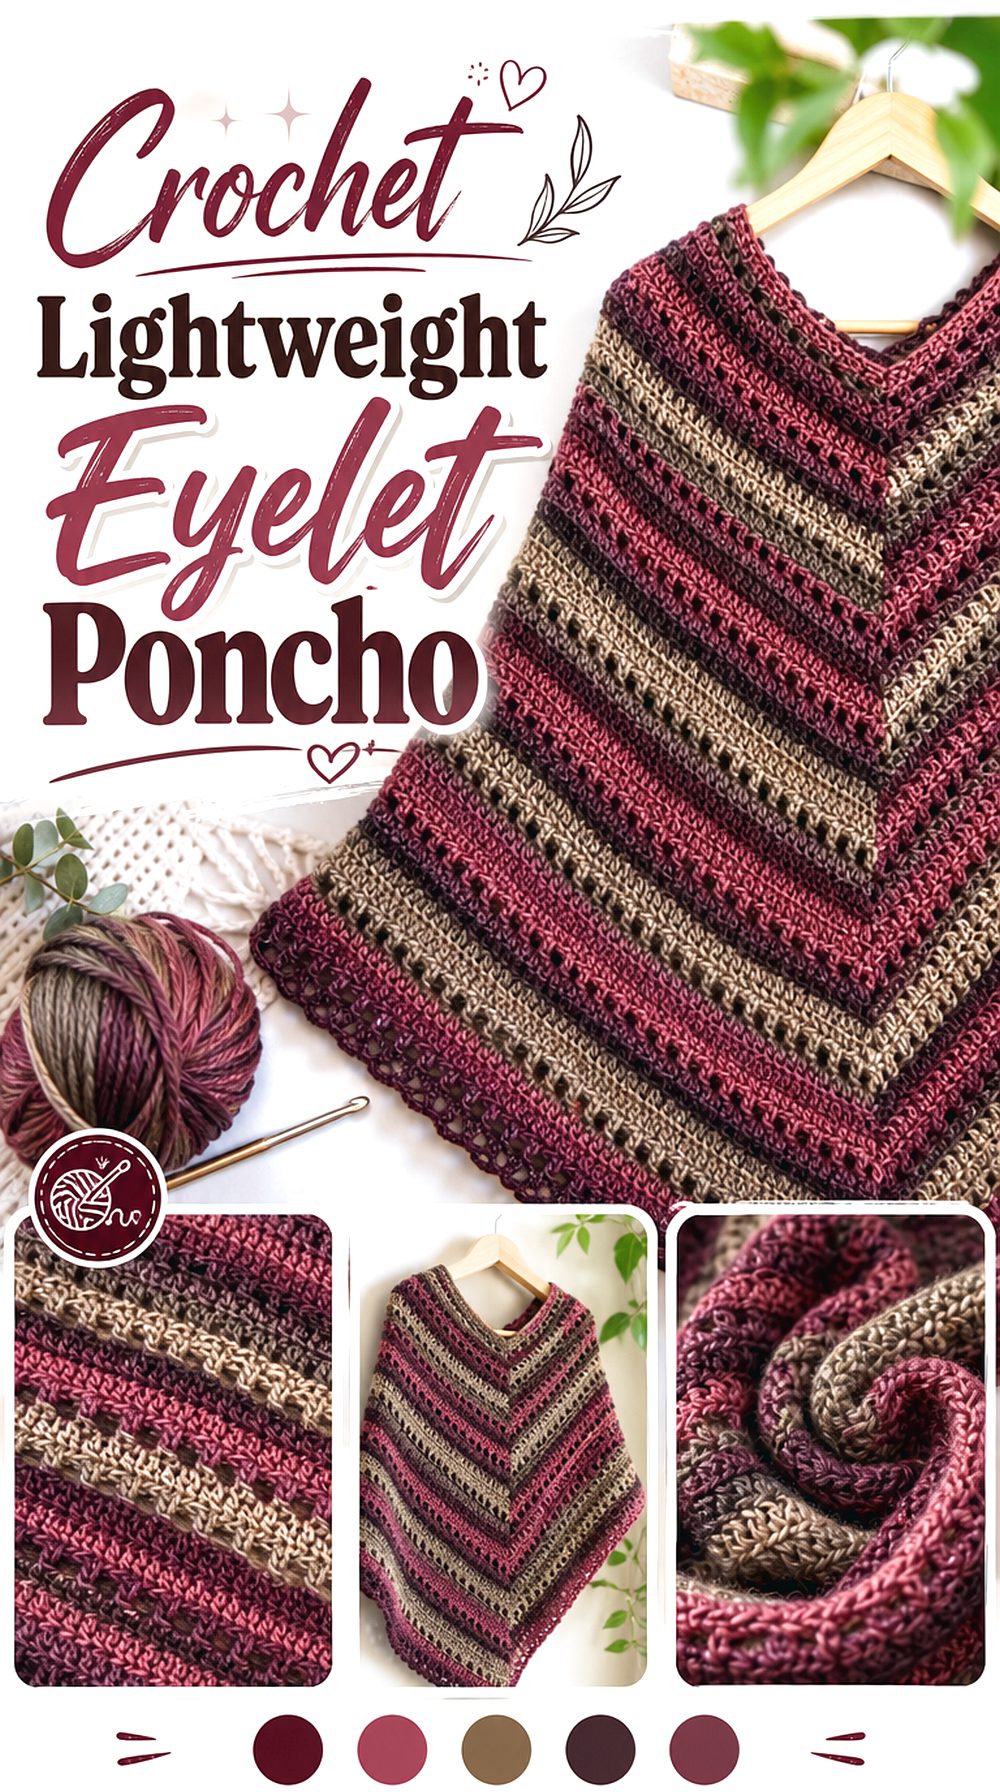
Eyelet rounds give this poncho a soft open texture without making it as loose-looking as a full mesh layer. The finished garment has a lighter feel and a more even allover shape, making it different from the tassel mesh poncho and the patchwork granny square option.
This project may suit readers who want a poncho with visible texture but not a heavily decorated surface. The source notes that the written pattern carries the size-specific details, so readers should plan to use both the visual guide and the written information.
Review the Size Notes
Sizing matters for any wearable, and this eyelet poncho specifically points readers toward the written pattern for full size details. That means the video alone may not be enough for everyone. Readers should review the available size notes before starting, especially if they need the garment to fit a particular bust range or preferred length.
Think About Open Texture
The eyelet rounds create breathability and visual texture, but they also affect coverage. Readers should consider what they plan to wear underneath and whether they want the openings to stand out or blend into the overall fabric. A softer color may make the eyelets subtle, while stronger contrast can make the texture more visible.
Keep the Written Guide Nearby
For this poncho, the written guide is especially useful because the creator states that it includes size-specific information. Readers who prefer video-only projects should note that some details may be easier to track in writing. Keeping the written pattern nearby can help with sizing decisions, progress checks, and final length.
Original Tutorial and Creator Credit
Creator: Hooked on Homemade Happiness
8. Crochet Cowl Neck Layering Poncho

A cowl neck changes the whole feeling of a poncho because the neckline becomes part of the design instead of a simple opening. The soft raised neck can frame the face and give the upper body more presence, while the poncho body still provides relaxed shoulder coverage.
This idea is different from the turtleneck poncho because a cowl usually has more drape and softness at the neck. It is also more neckline-focused than the ruana, mesh, or buttoned shawl-style options.
Look at the Neckline Shape
The cowl is the main detail to evaluate. Readers should check whether it sits softly, folds over, or stands higher around the neck. This affects how the poncho pairs with coats, scarves, and base layers. A cowl can add warmth and style, but only if the finished neckline matches the wearer’s comfort preference.
Plan What to Wear Underneath
A cowl neck poncho often works best when the layer underneath does not fight with the neckline. Readers may want to avoid bulky collars under it unless the finished cowl leaves enough room. A smooth long-sleeve top or fitted layer can help the neckline remain the main feature.
Check the Creator’s Pattern Support
Because neckline shaping can be harder to judge from a finished photo alone, readers should check whether the creator provides a written pattern, notes, or skill support linked with the project. Clear support is useful when the poncho has a specific neck shape rather than a simple open edge.
Original Tutorial and Creator Credit
Creator: Marly Bird
9. Crochet Turtleneck Cold Weather Poncho
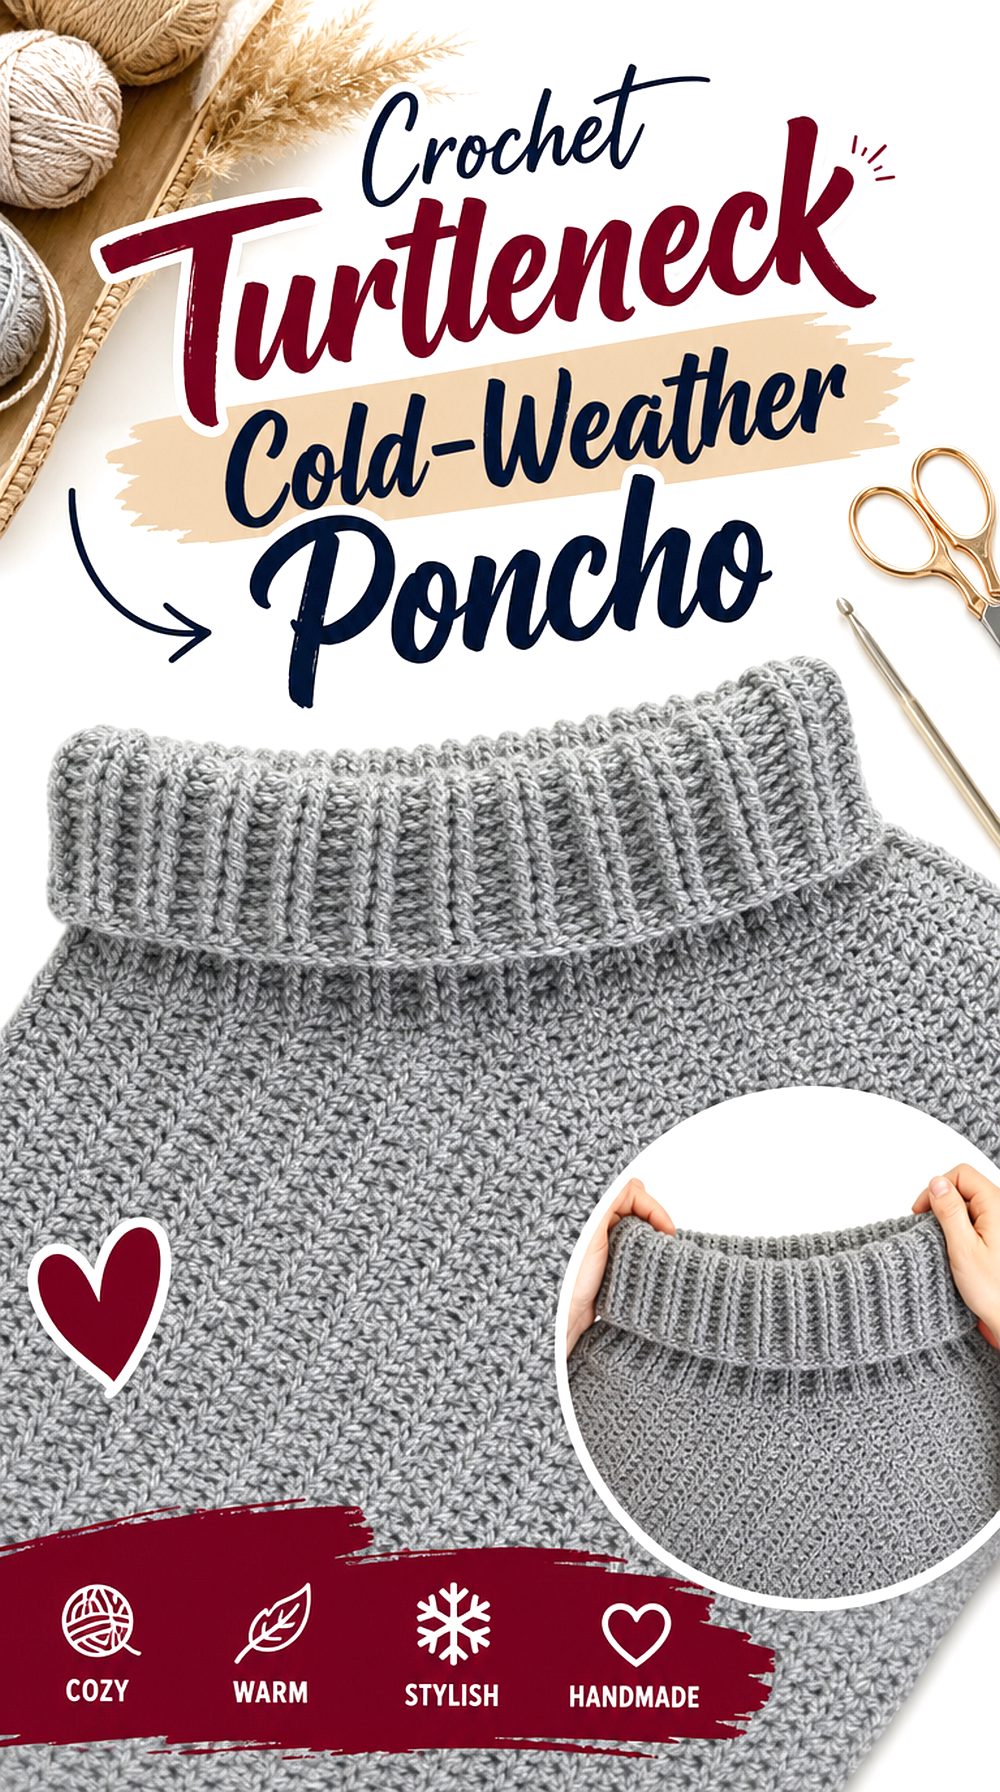
The turtleneck version is a stronger neck-coverage idea than the cowl poncho. Instead of a soft draped collar, the upper section is meant to sit closer and higher, giving the garment a more bundled look. This makes it useful for readers who want a poncho that feels more like a cold-weather layer.
It stands apart from the hooded poncho because there is no hood shape to manage, and it differs from the mesh and eyelet projects because coverage is the main visual message.
Think About Neck Comfort
A turtleneck poncho should be chosen with neck comfort in mind. Some readers like a higher collar, while others prefer a looser opening. Before starting, it is worth studying the finished neckline and checking whether the source gives enough information to understand how close or relaxed the neck area will be.
Consider the Intended Season
This style naturally feels more cold-weather than a mesh or eyelet poncho. Readers should consider when they plan to wear it and how much layering space they want underneath. The turtleneck may reduce the need for a separate scarf, but the body length and fabric density still matter for overall coverage.
Compare the Fit From Each Angle
A turtleneck poncho can look different from the front, side, and back because the collar changes the upper silhouette. Readers should look for enough finished views to judge the neckline height, shoulder drape, and lower edge. This is especially useful if the poncho will be worn over heavier seasonal clothing.
Original Tutorial and Creator Credit
Creator: Lanas y ovillos
10. Crochet Color Block Ruana Poncho
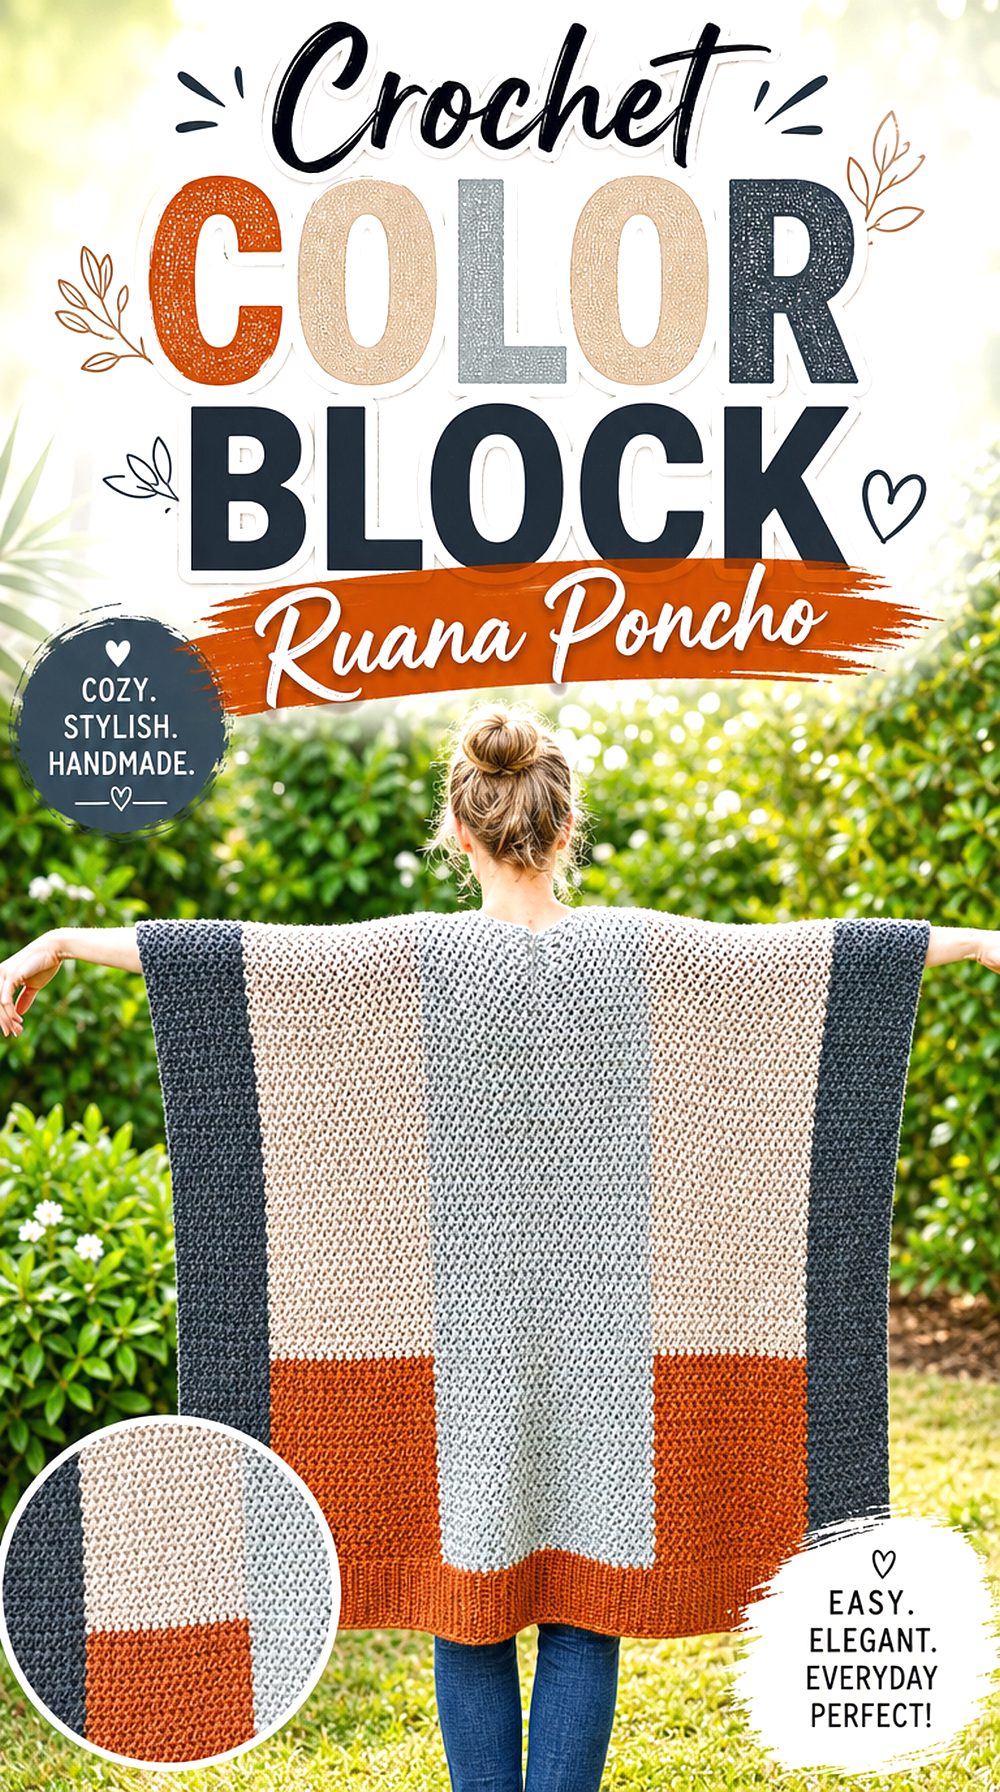
A ruana poncho opens at the front, so it feels more like a loose wrap than a closed pullover. The color blocking gives this version a modern layout, while the rectangle-based construction keeps the overall concept understandable. It is a strong choice for readers who want coverage across the shoulders and back without a fixed front closure.
Compared with the buttoned shawl-style poncho, this ruana keeps the front more open. Compared with the granny square poncho, the color changes appear in larger blocks instead of separate motifs.
Check the Open Front
The open front is the main difference between a ruana and many other ponchos. Readers should decide whether they want a garment that stays open or whether they prefer a closed shape. An open front can make layering easier, but it may shift more during wear unless the finished drape suits the wearer.
Plan the Color Blocks
Color blocking makes this poncho visually structured. Readers should think about whether they want high contrast, soft tonal blocks, or a more neutral arrangement. The placement of colors can change how wide, long, or balanced the garment appears, especially because a ruana is viewed from the front as two hanging panels.
Confirm the Seaming Method
The source describes this as part of a simple-shapes collection, so the finishing and seaming choices matter. Readers should check how the rectangles become a ruana shape and whether the creator links extra seaming support. Clean joining will help the open front hang evenly and keep the color block layout intentional.
Original Tutorial and Creator Credit
Creator: Ned & Mimi
11. Crochet Child Size Cozy Poncho
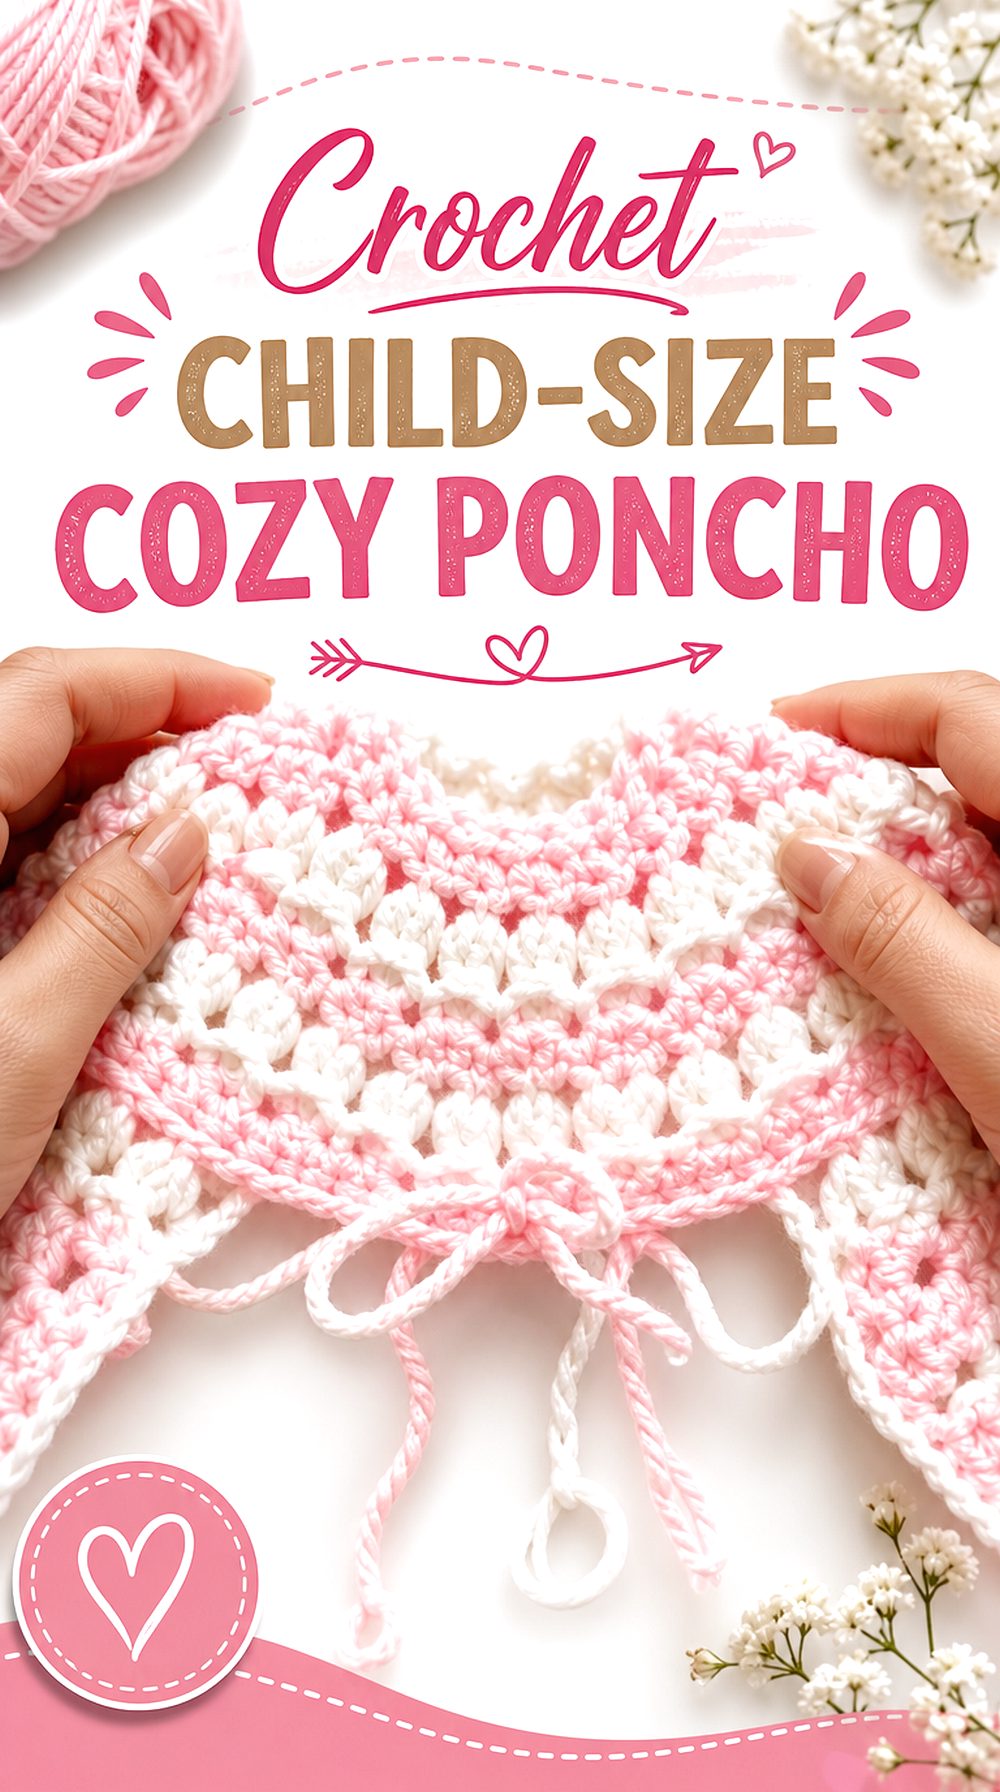
A child-size poncho brings a different set of decisions from adult layering pieces. The finished shape needs to be comfortable for movement, easy to put on, and appropriate for the child’s size range. This tutorial is aimed at kids, which makes it a useful option for readers who want a smaller garment instead of another adult poncho.
It differs from the baby poncho idea because this one is framed for toddlers or young children, and it differs from the adult designs because fit and ease of wearing matter in a different way.
Review the Child Size Range
Size range is the first detail to check for a child’s poncho. Children grow quickly, and a garment that is too short or too narrow may not be worn for long. Readers should compare the creator’s sizing information with the child’s current measurements and preferred coverage before choosing this project.
Think About Movement
A child’s poncho should allow the arms and shoulders to move without the fabric feeling awkward. Readers should look closely at the finished shape, side coverage, and neckline opening. The poncho should be easy to wear over clothing, but no source should be assumed to fit every child without checking the measurements.
Check the Neck Opening
The neck opening is especially important for children’s garments. It should be comfortable to put on and take off, and the finished view should show how it sits. Readers should avoid guessing based on age alone and should use the creator’s information to decide whether the opening and overall fit are suitable.
Original Tutorial and Creator Credit
Creator: Crochet Jewel
12. Crochet Asymmetrical Fringe Poncho
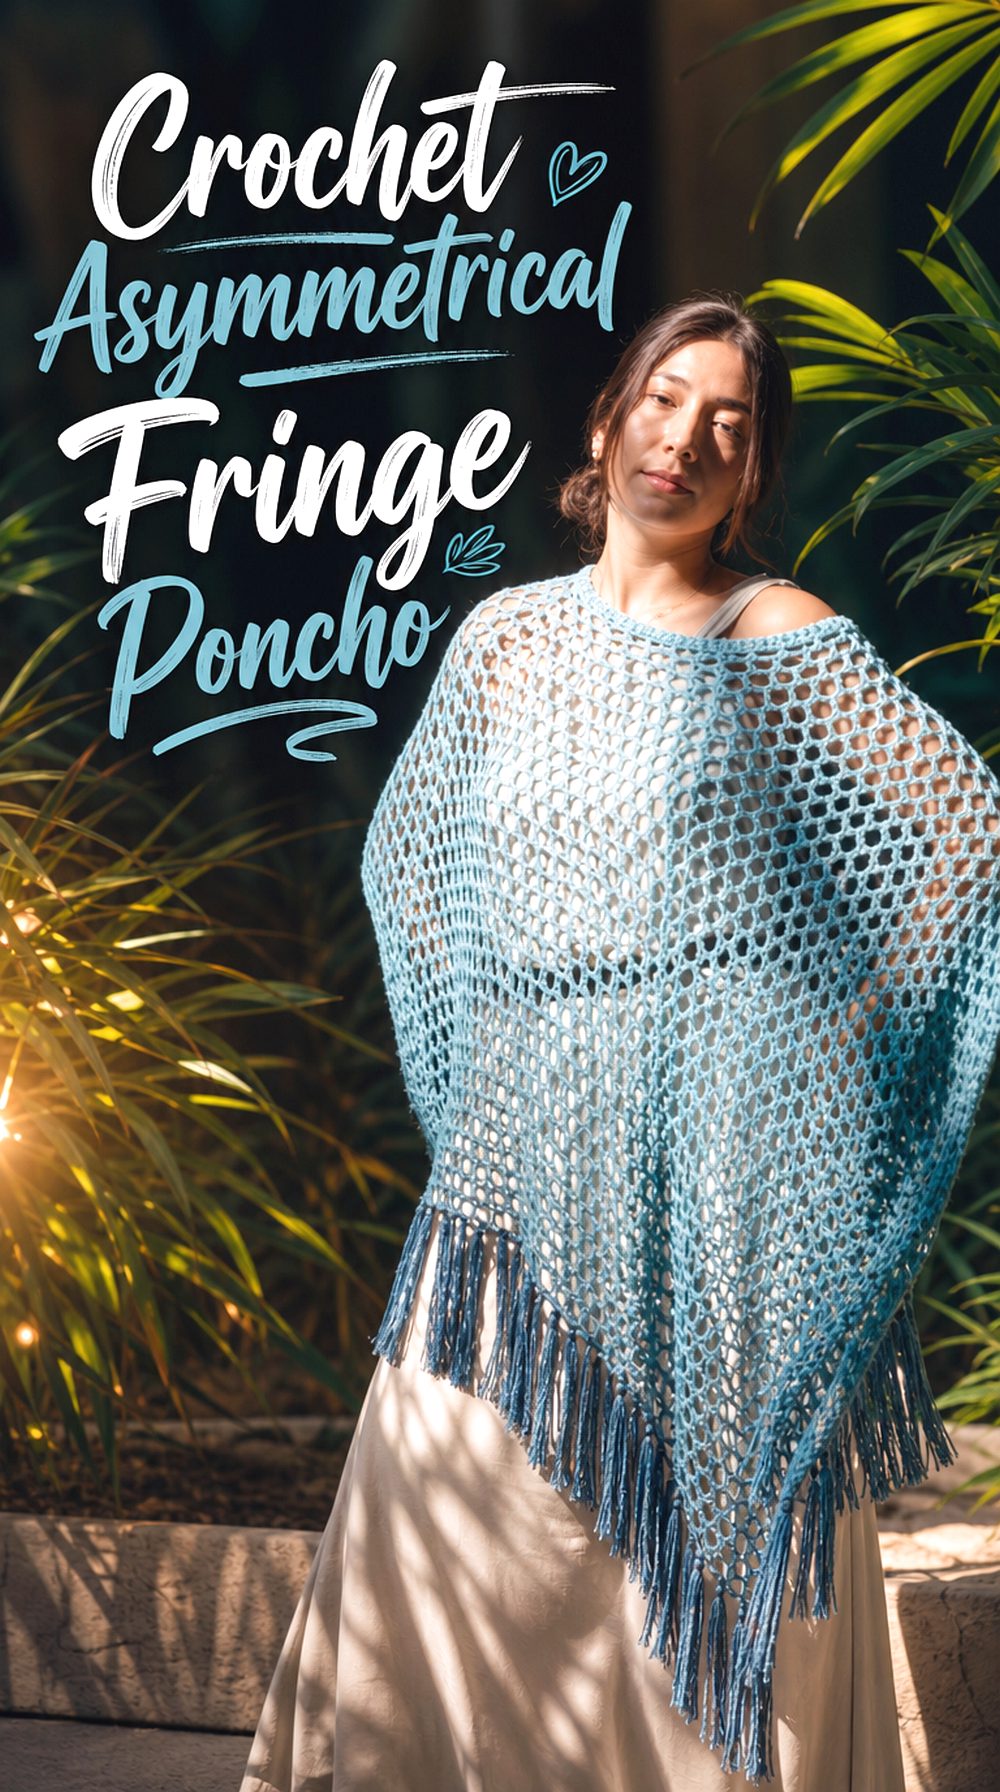
An asymmetrical poncho gives the collection a more directional shape because the hem and styling do not have to mirror evenly on both sides. The optional fringe adds a second design decision, letting the finished piece lean more boho, dramatic, or minimal depending on the version followed.
This option is different from the simple mesh poncho because it includes both symmetrical and asymmetrical possibilities. It also gives readers a chance to think about how a slanted or uneven hem changes the way a poncho moves.
Choose the Symmetrical or Asymmetrical Version
The most important decision is whether to make the balanced version or the asymmetrical version. A symmetrical poncho may feel easier to style with everyday outfits, while an asymmetrical shape can look more expressive. Readers should compare the finished versions before starting so they understand how the construction choice changes the final silhouette.
Decide on the Fringe
Fringe can make the lower edge more decorative, but it also adds movement and length. Readers should decide whether they want that extra detail or whether the poncho shape is strong enough without it. Checking the final reveal helps show whether the fringe supports the garment or feels too busy for the intended wardrobe.
Pause at Major Shape Changes
A poncho with more than one version requires extra attention when the shape changes. Readers should pause at the point where the chosen version separates from the other option and make sure they are following the correct path. A simple progress note can prevent mixing instructions from two different finished looks.
Original Tutorial and Creator Credit
Creator: it’s erin b.
Conclusion
These crochet poncho ideas show how much variety can fit inside one garment category. A rectangle poncho keeps the shape simple, while the granny square and color block ruana versions make layout and color more important. The hooded, cowl, and turtleneck ponchos focus on upper-body coverage, and the mesh, eyelet, tassel, and asymmetrical options create lighter or more decorative finishes.
Readers should choose based on neckline, openness, length, closure, size information, and how the poncho will be layered. Use the original tutorials for exact construction details before beginning.
FAQs
How do I choose the right crochet poncho shape?
Start with how you want the poncho to sit on the body. A rectangle poncho gives a simple draped shape, a ruana stays open at the front, and a hooded or turtleneck poncho gives more upper coverage. Compare the finished views before choosing so the neckline and hem match your wearing plans.
What should I check before making a crochet poncho from YouTube?
Check the finished view, size notes, neckline, length, material list, and whether a written pattern is linked. Some tutorials include full visual guidance, while others rely on a written pattern for sizing or stitch counts. For wearable projects, sizing information matters more than the title or thumbnail.
Are crochet ponchos good for layering?
Many crochet ponchos can work for layering, but the amount of coverage depends on the fabric and shape. Mesh and eyelet ponchos may need a base layer underneath, while cowl, turtleneck, and hooded ponchos give more coverage near the neck and shoulders. Always check the finished openness before planning outfits.
Can I change the yarn for a crochet poncho tutorial?
Only change yarn after checking the creator’s notes, gauge information, and finished measurements. A different yarn can affect drape, size, weight, and how the poncho hangs. This is especially important for ruanas, mesh ponchos, and cowl-neck styles where softness and movement affect the final look.
Can I sell a poncho made from a YouTube tutorial?
Do not assume selling is allowed just because the tutorial is public. Check the creator’s written terms, video description, website policy, or pattern license before selling finished items. Some creators allow sales with conditions, while others may restrict commercial use of their designs or written patterns.